
We are excited to launch our new Step-by-Step blog series on running Nextflow pipelines in Seqera Platform. With accompanying technical guides, the series also demonstrates how to create and configure environments for flexible tertiary analysis and troubleshooting with Studios.
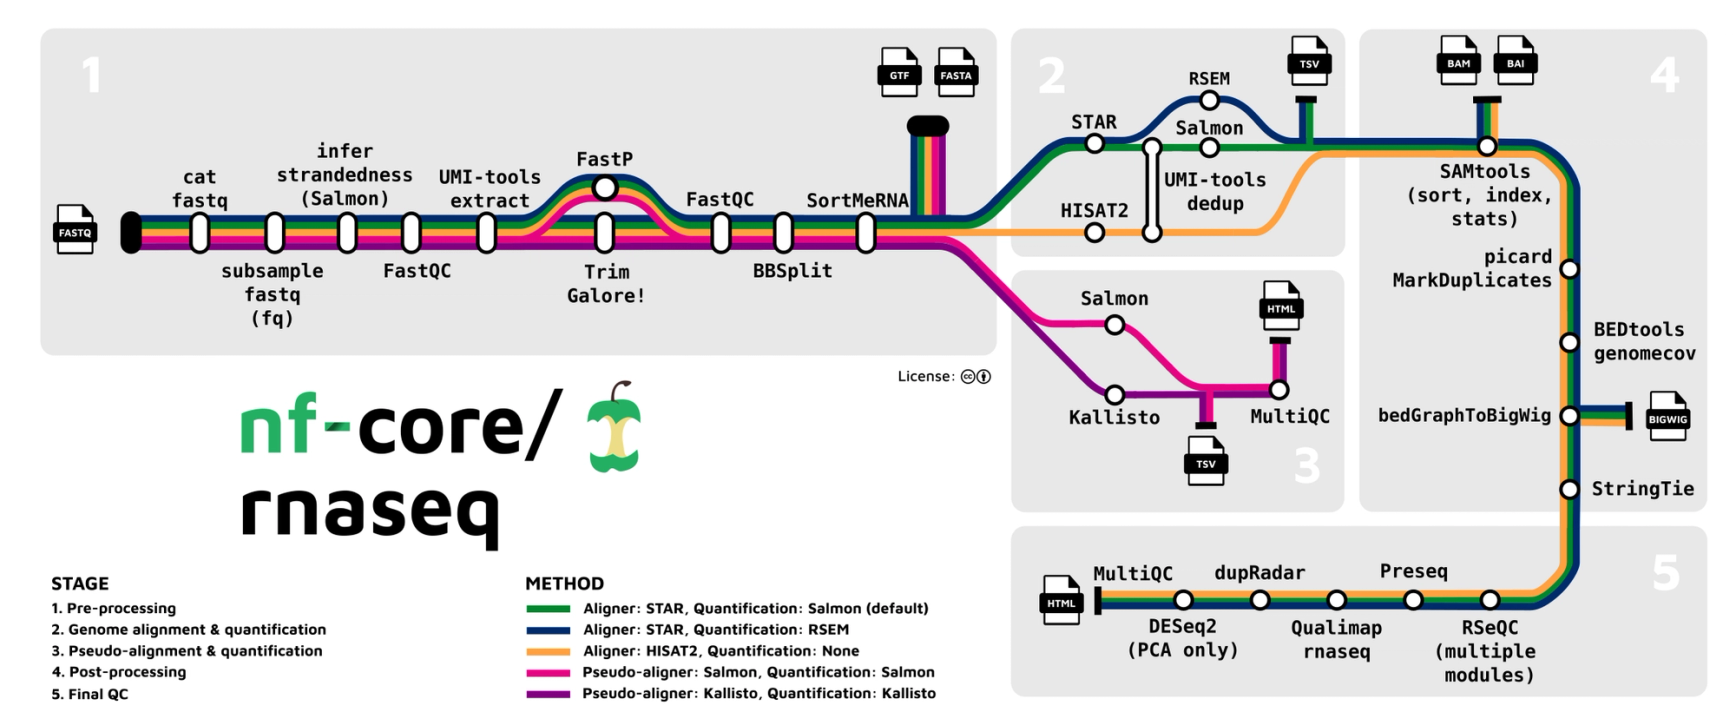
First up: bulk RNA sequencing (RNA-Seq) analysis with the popular nf-core/rnaseq pipeline.
The challenge of bulk RNA-Seq analysis
A single RNA-Seq experiment can generate gigabytes, or even terabytes, of raw data. Translating this data into meaningful scientific results demands substantial computational power, automation, and storage.
As data volumes continue to grow, analysis becomes increasingly complex, especially when leveraging public resources while maintaining full sovereignty over your data. The solution? Seqera — a centralized bio data stack for bulk RNA-Seq analysis.
In this blog post, we provide a step-by-step guide to analyze RNA-Seq data with Seqera, from quality control to differential expression analysis. We also demonstrate how to perform downstream analysis and visualize your data in a unified location.
Check out the full RNA-Seq guide now
Perform bulk RNA-Seq analysis in Seqera
1. Add a compute environment
In Seqera, you are not limited to hosted compute solutions. Add and configure your choice of cloud or HPC compute environments tailored to your analysis needs in your organization workspace.
💡 Hint: Depending on the number of samples and the sequencing depth of your input data, select the desired compute and storage recommendations for your RNA-Seq analysis.
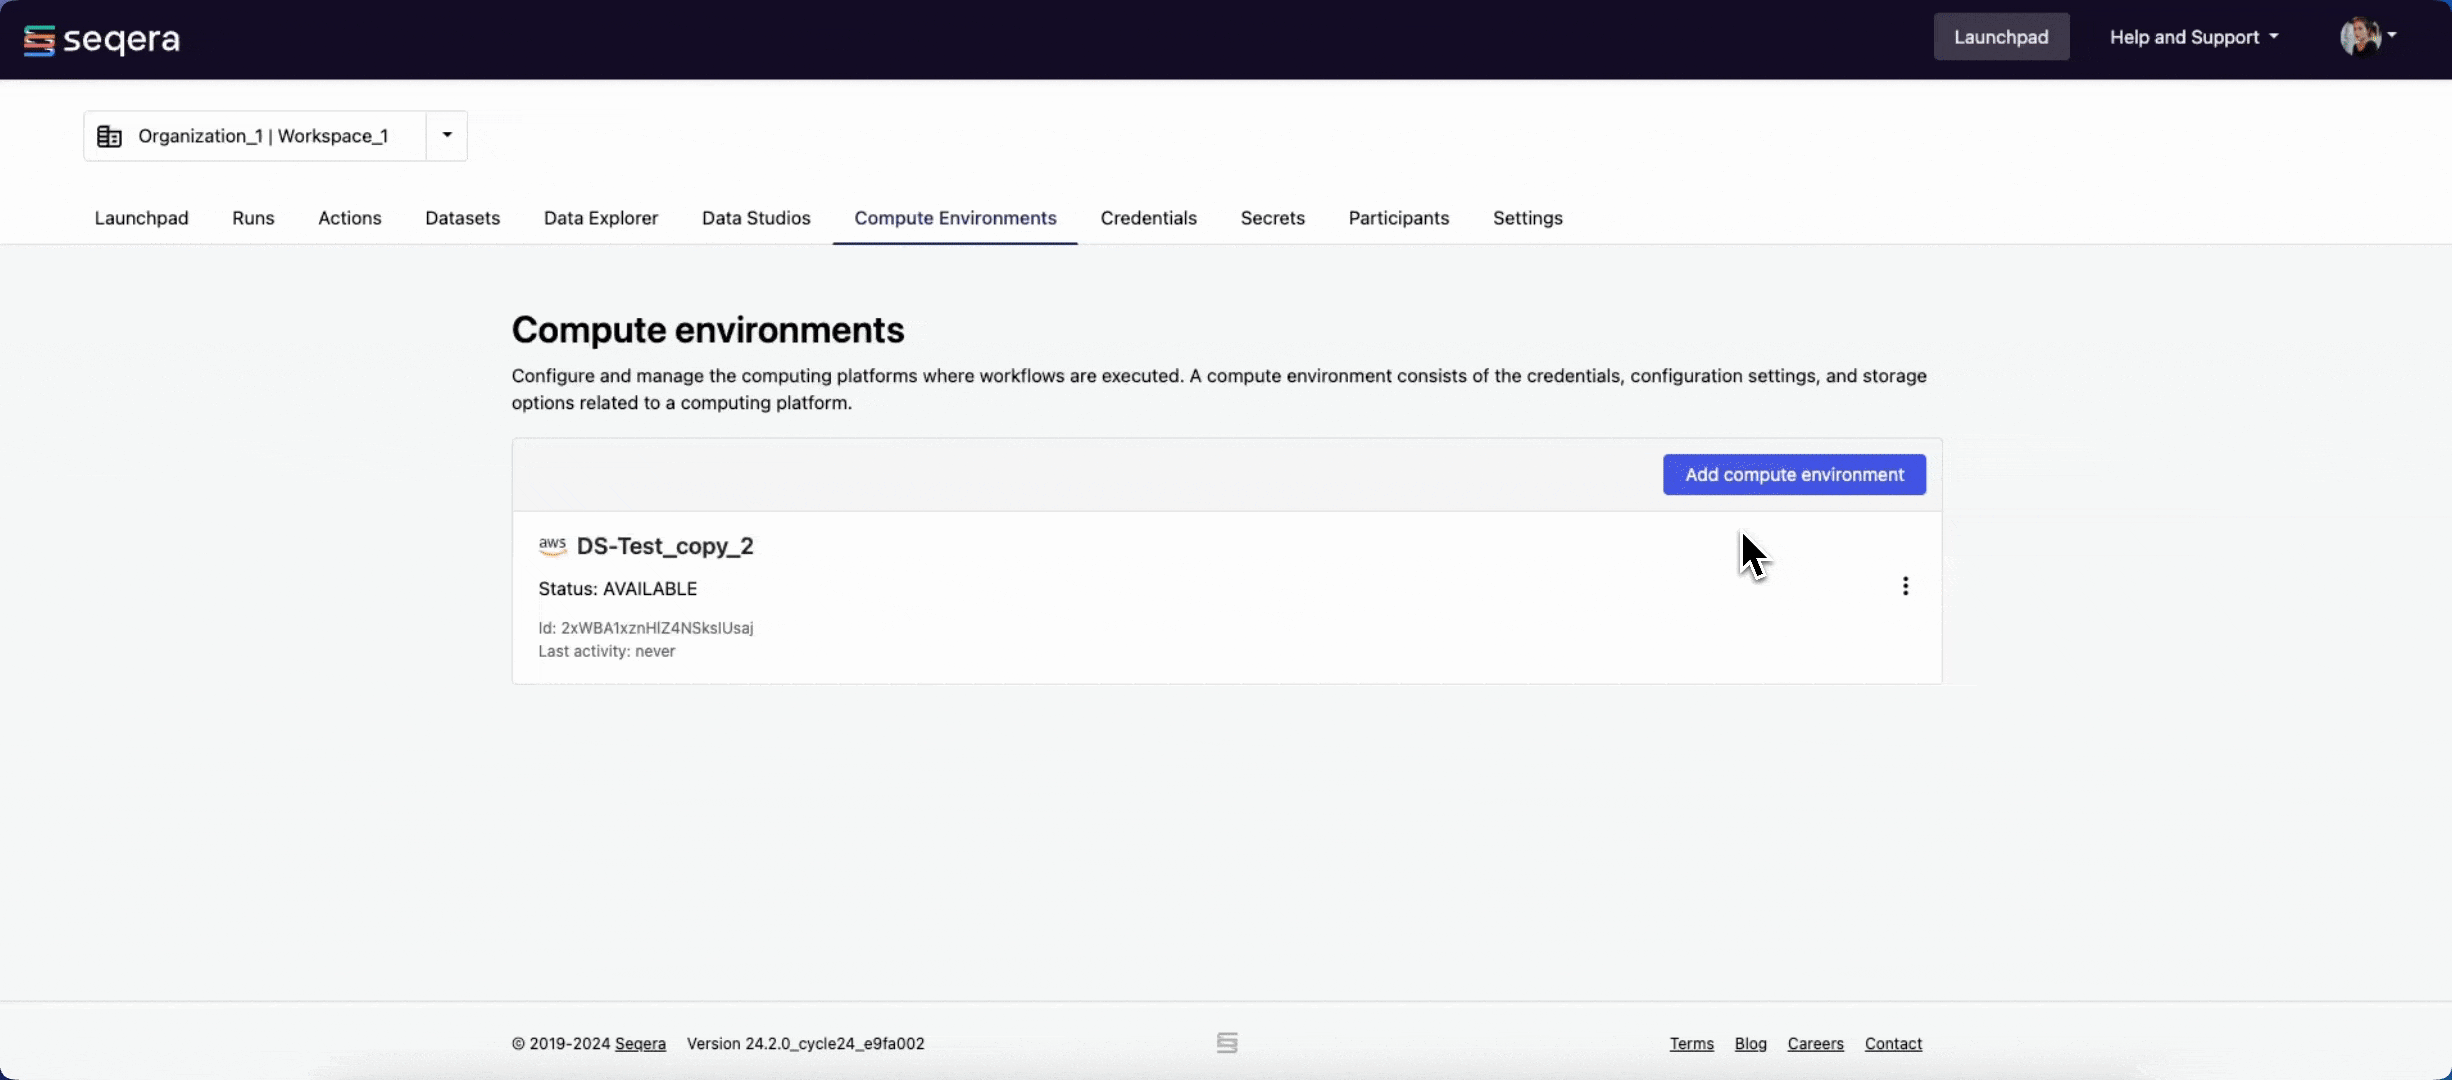
See the full RNASeq guide for AWS Batch compute environment configuration steps.
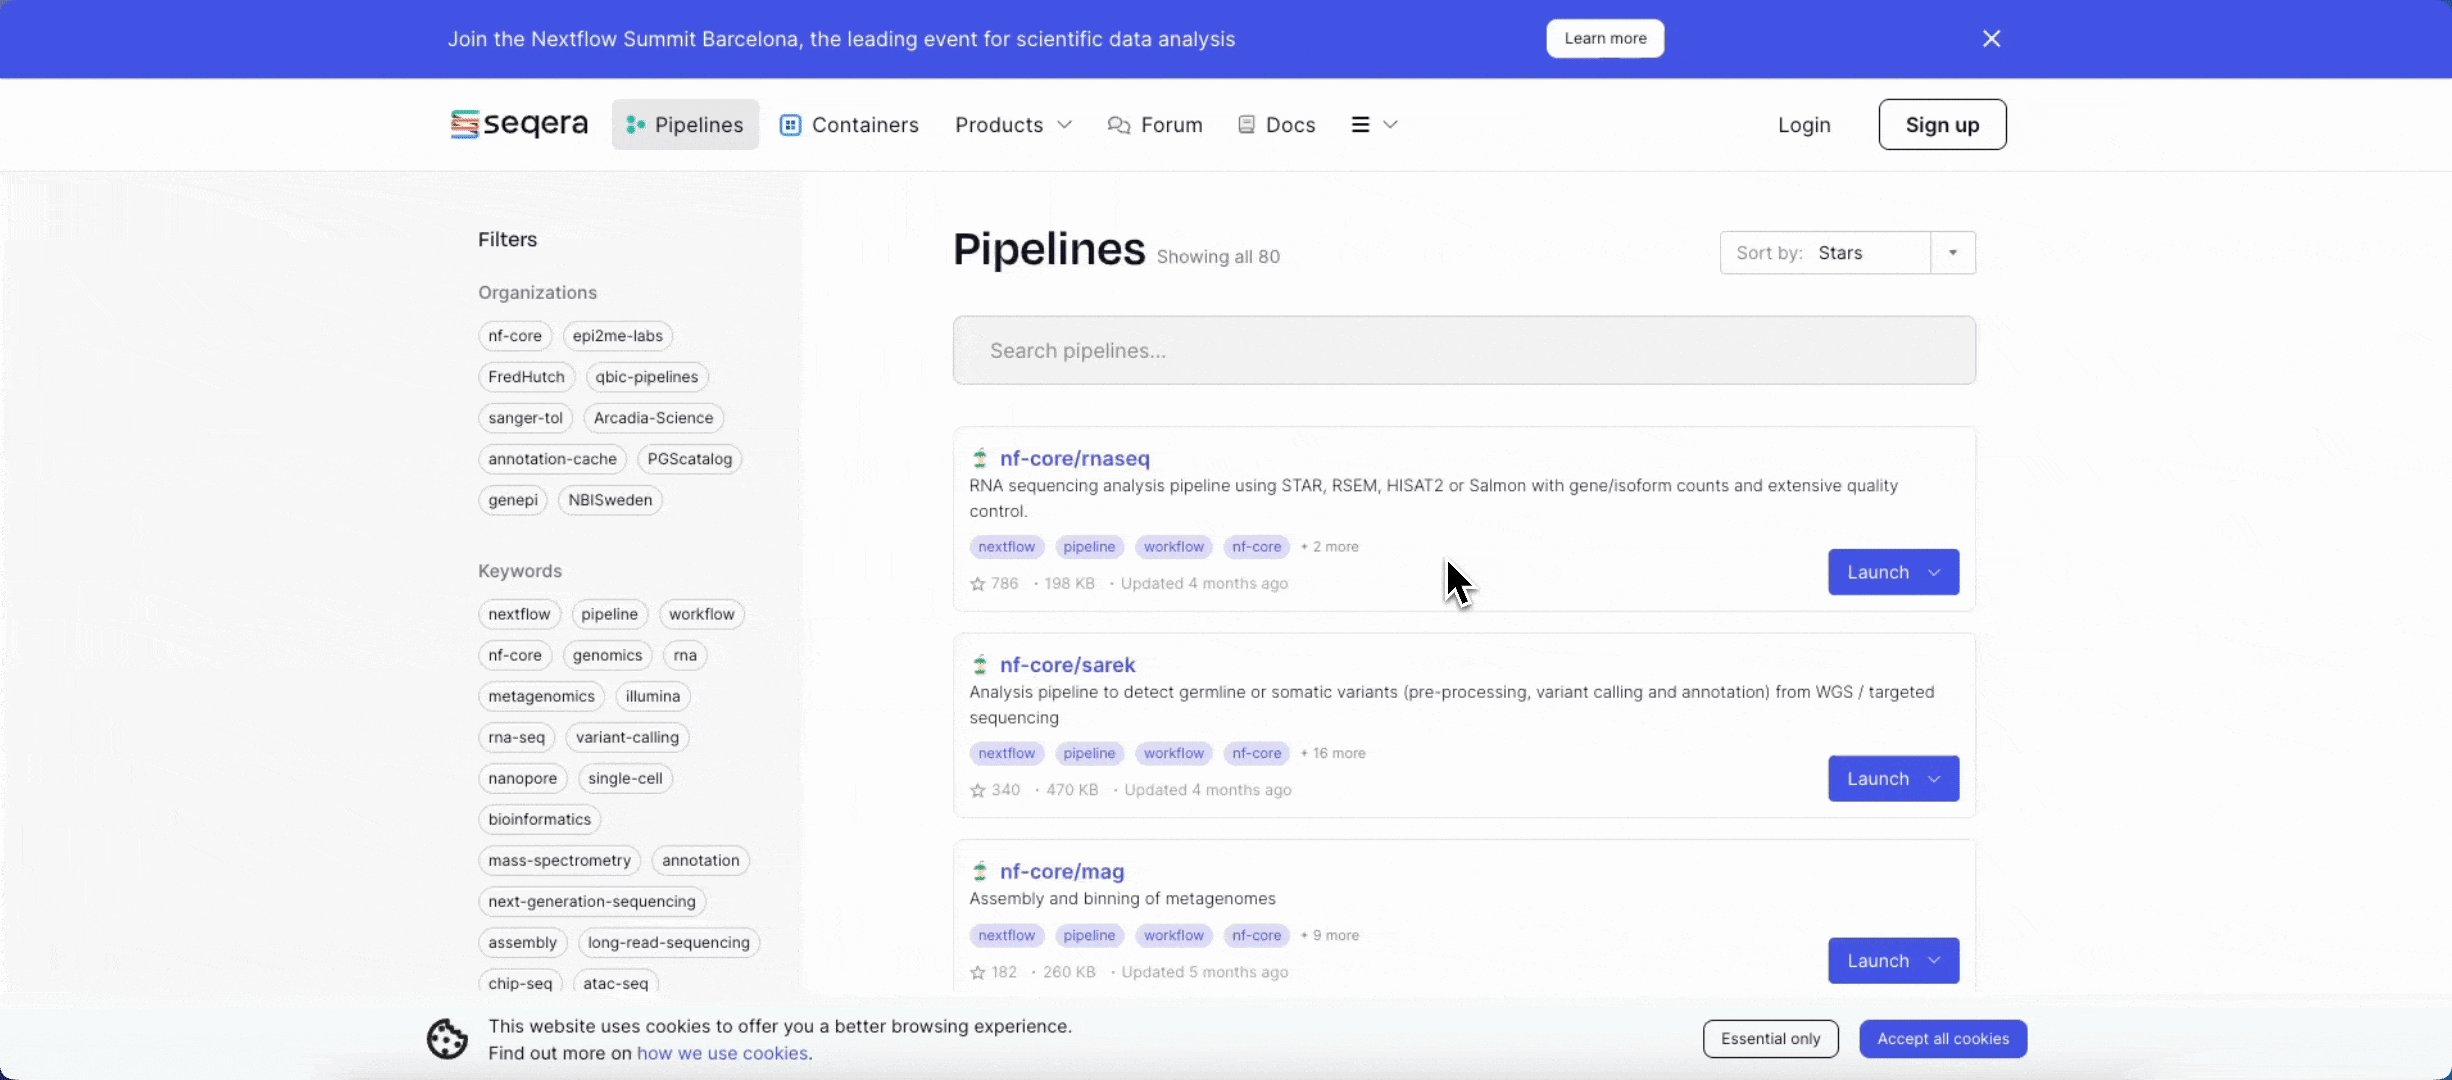
2. Add the nf-core/rnaseq pipeline to your workspace
Quickly locate and import the nf-core/rnaseq pipeline from Seqera Pipelines, the largest curated open source repository of Nextflow pipelines.
3. Add your input data
Easily access your RNA-Seq data directly from cloud storage with Data Explorer, or upload your samplesheets as CSV or TSV files with Seqera Datasets.
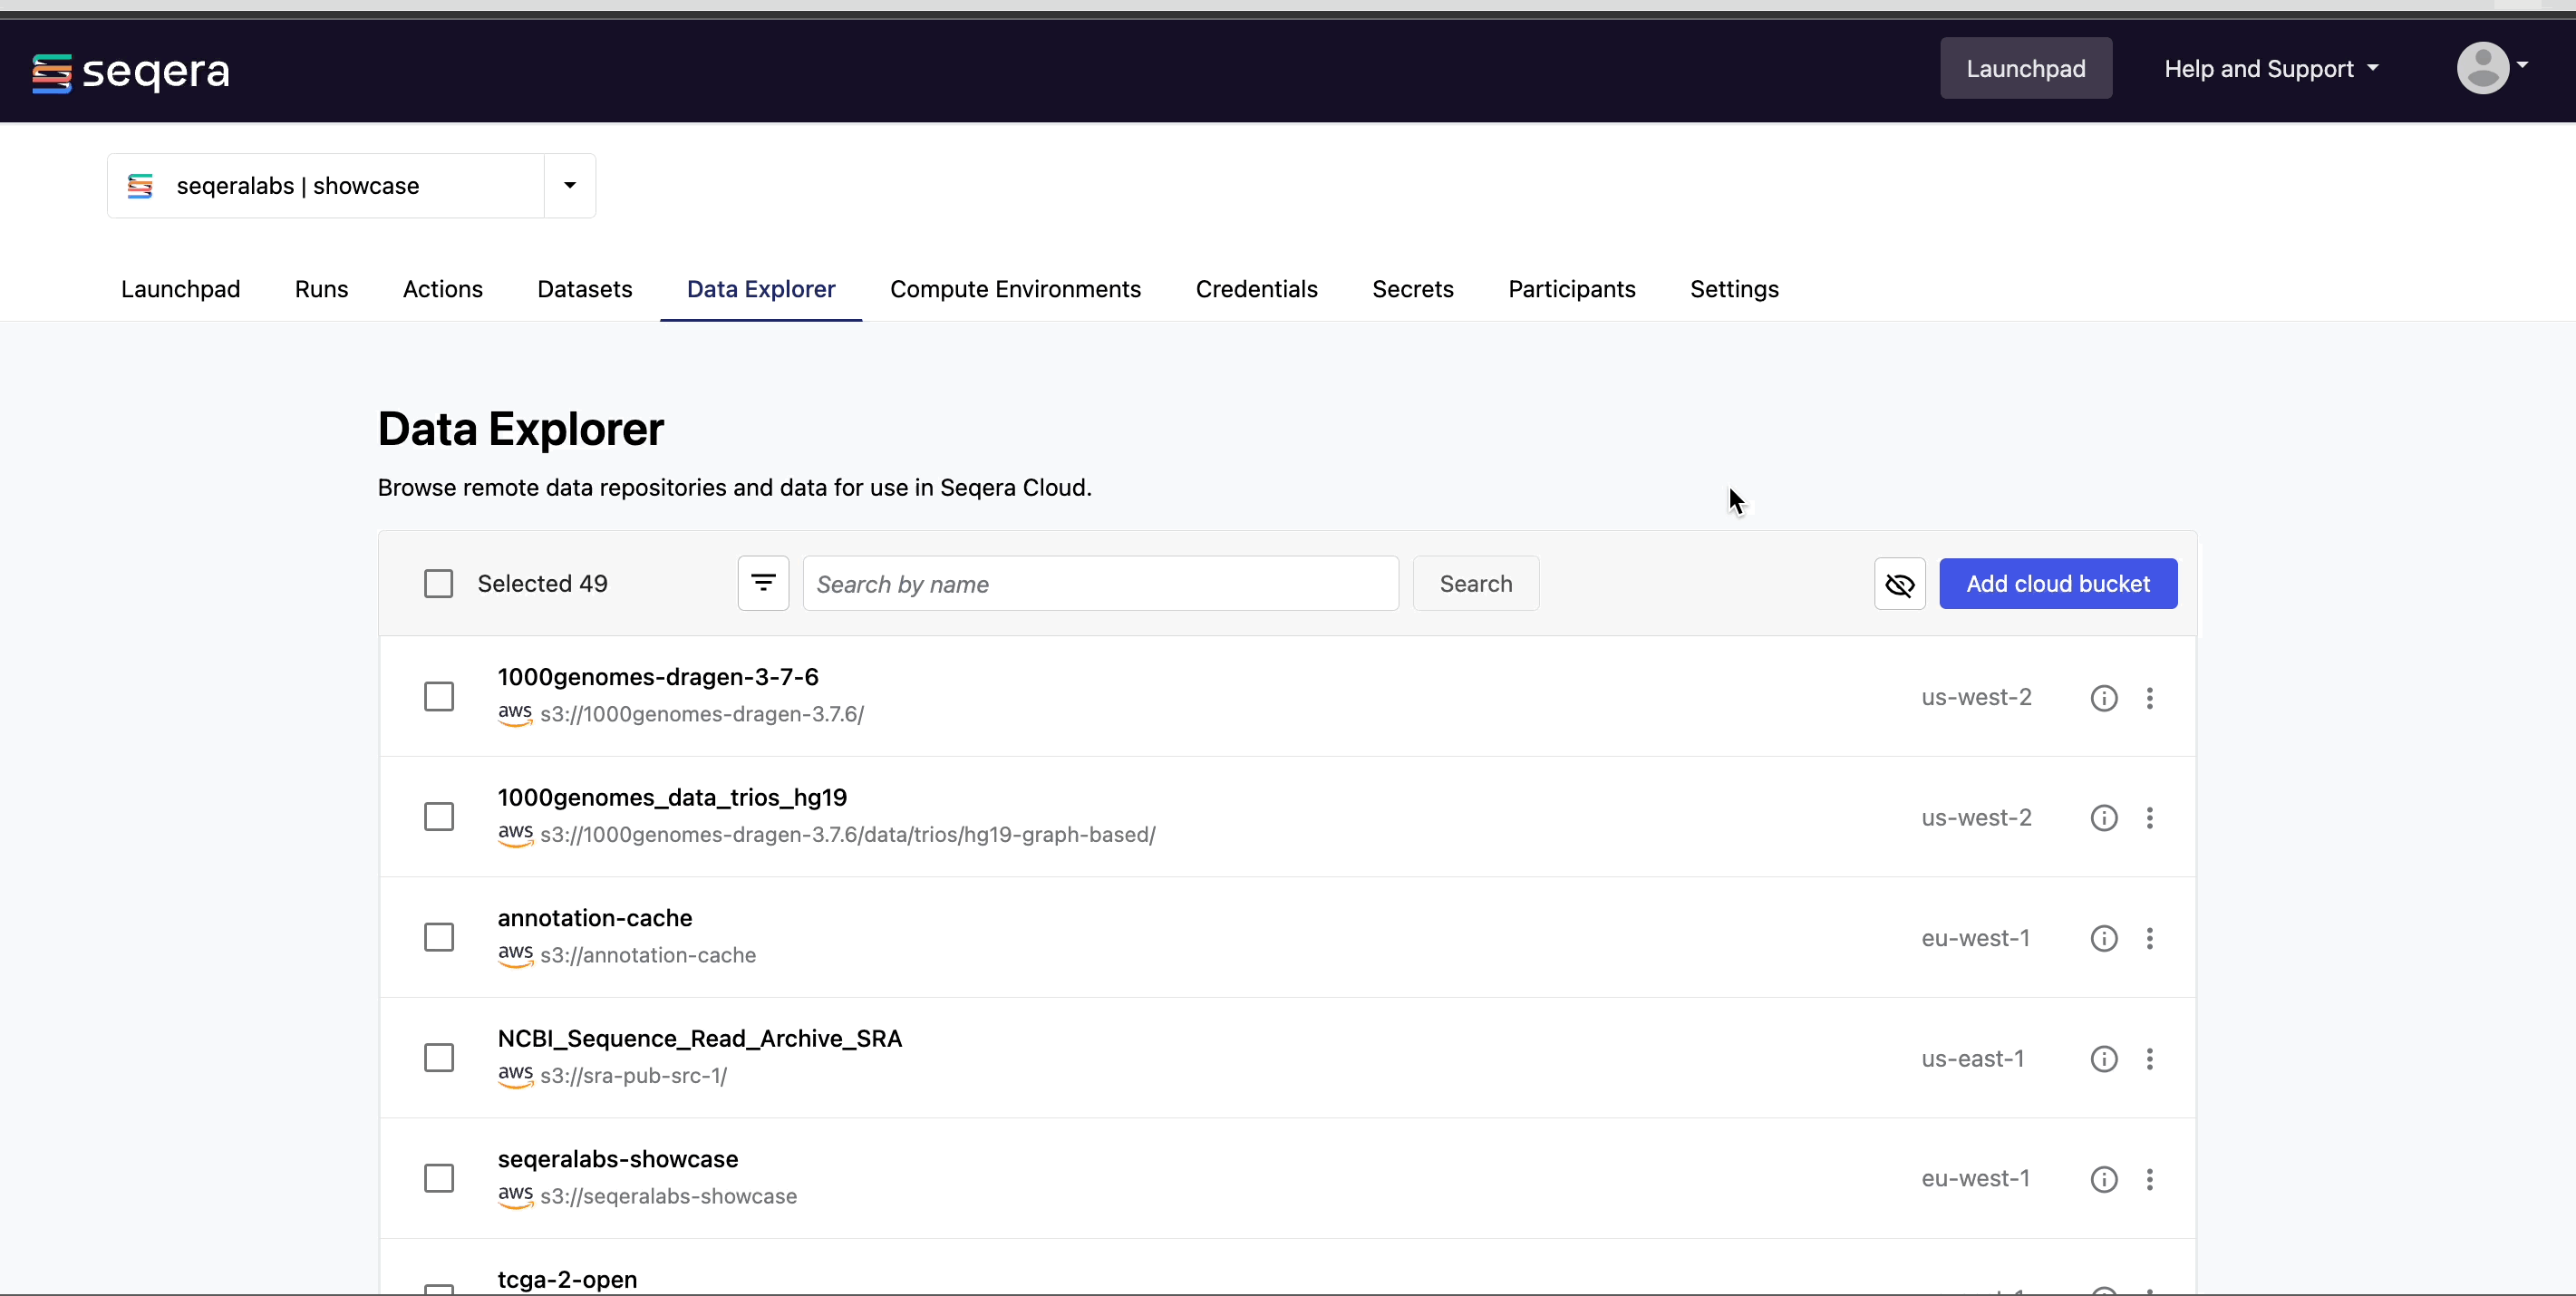
For more information on how to add samplesheets or other data to your workspace, see Add data.
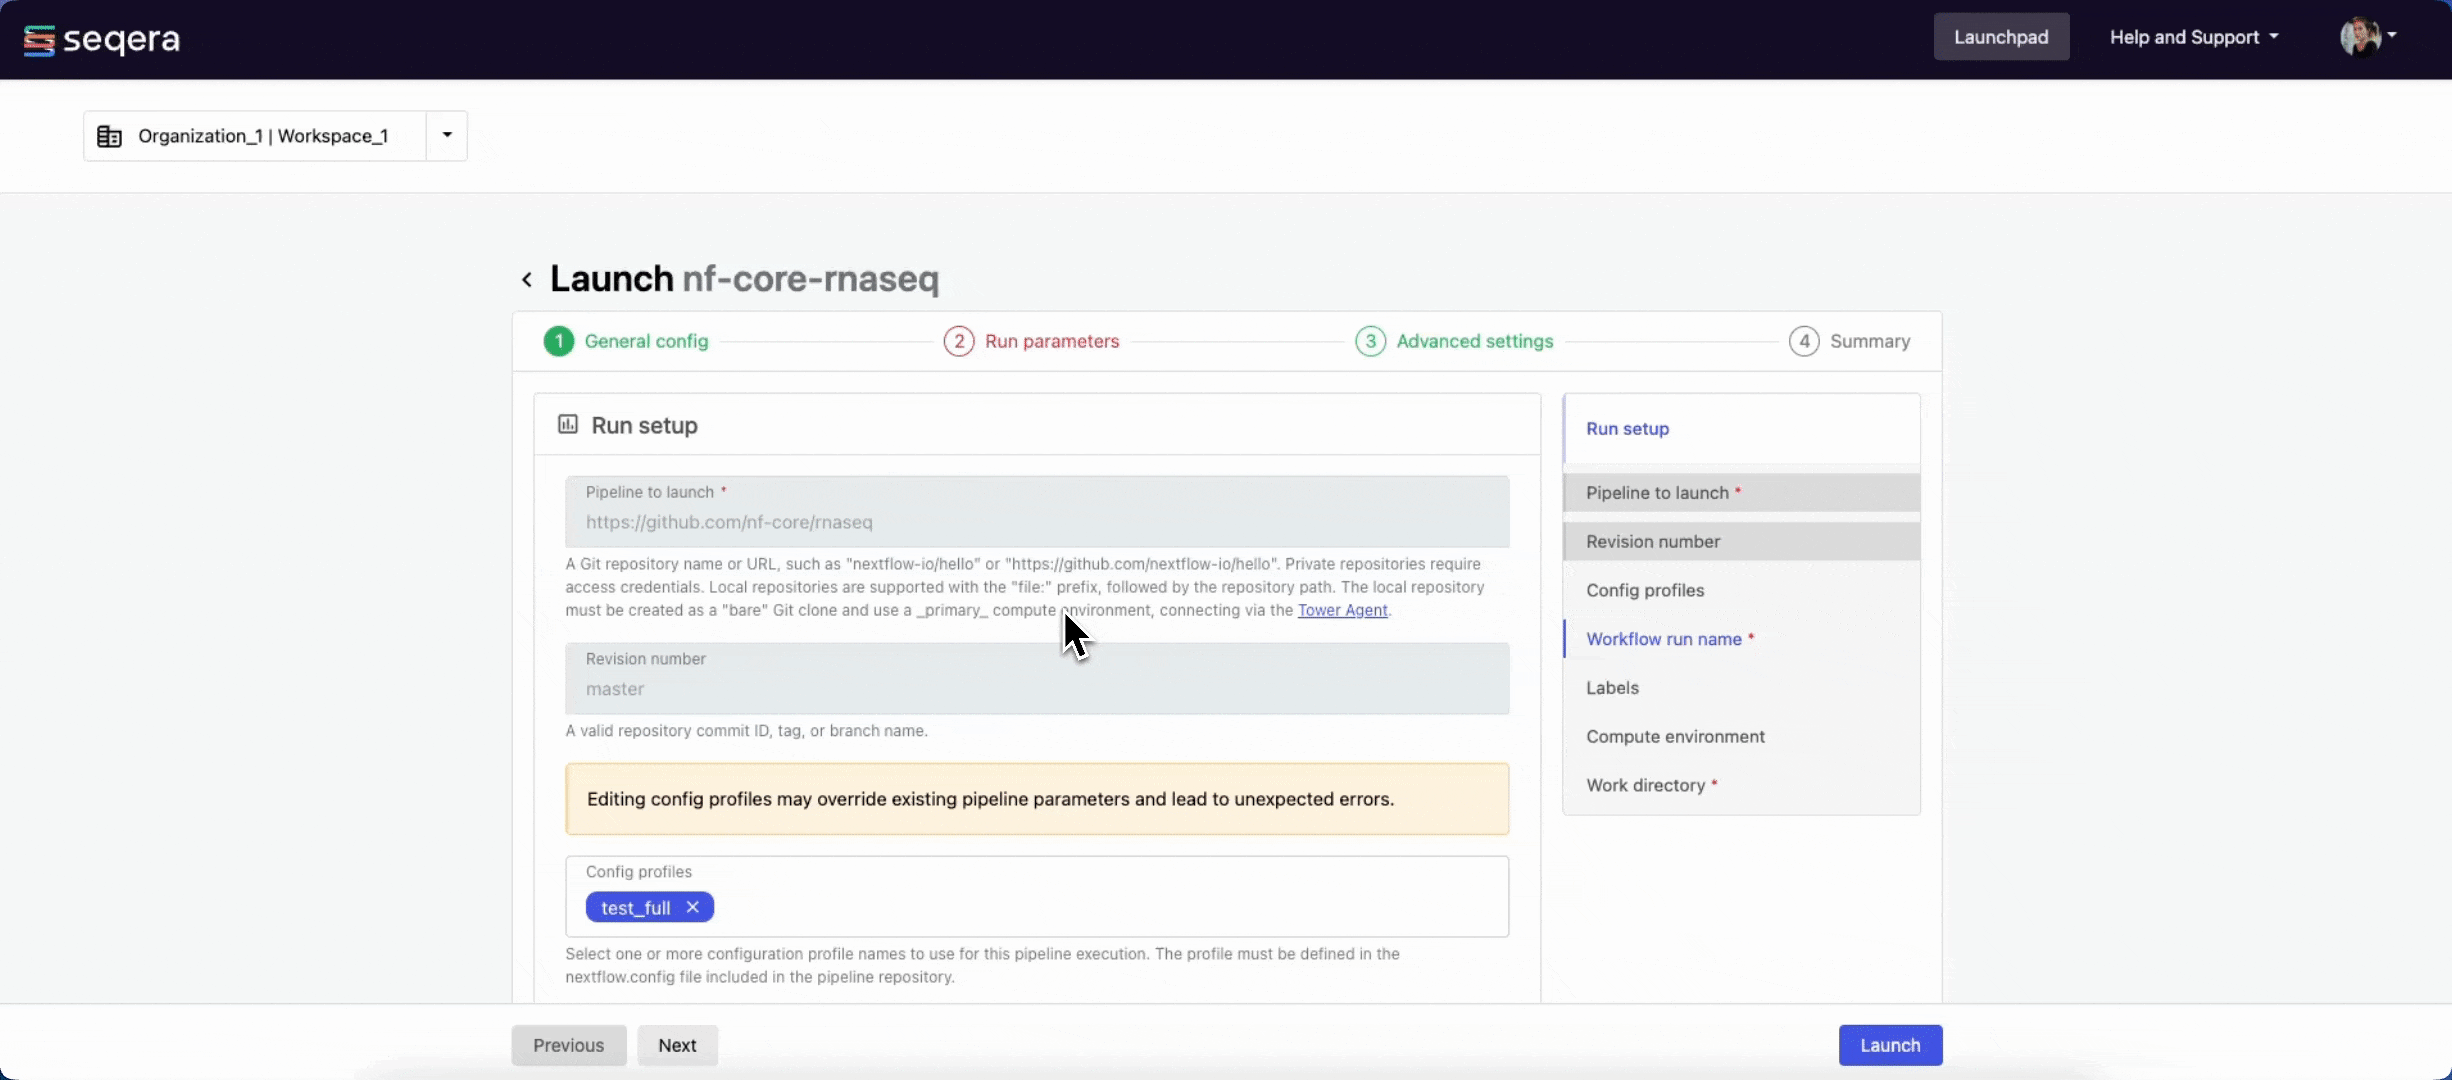
4. Launch your RNA-Seq analysis
So far, you have:
✔ Created a compute environment
✔ Added a pipeline to your workspace
✔ Made your RNA-Seq data accessible
With your compute environment, pipeline, and data all accessible in your Seqera workspace, you are now ready to launch your analysis.
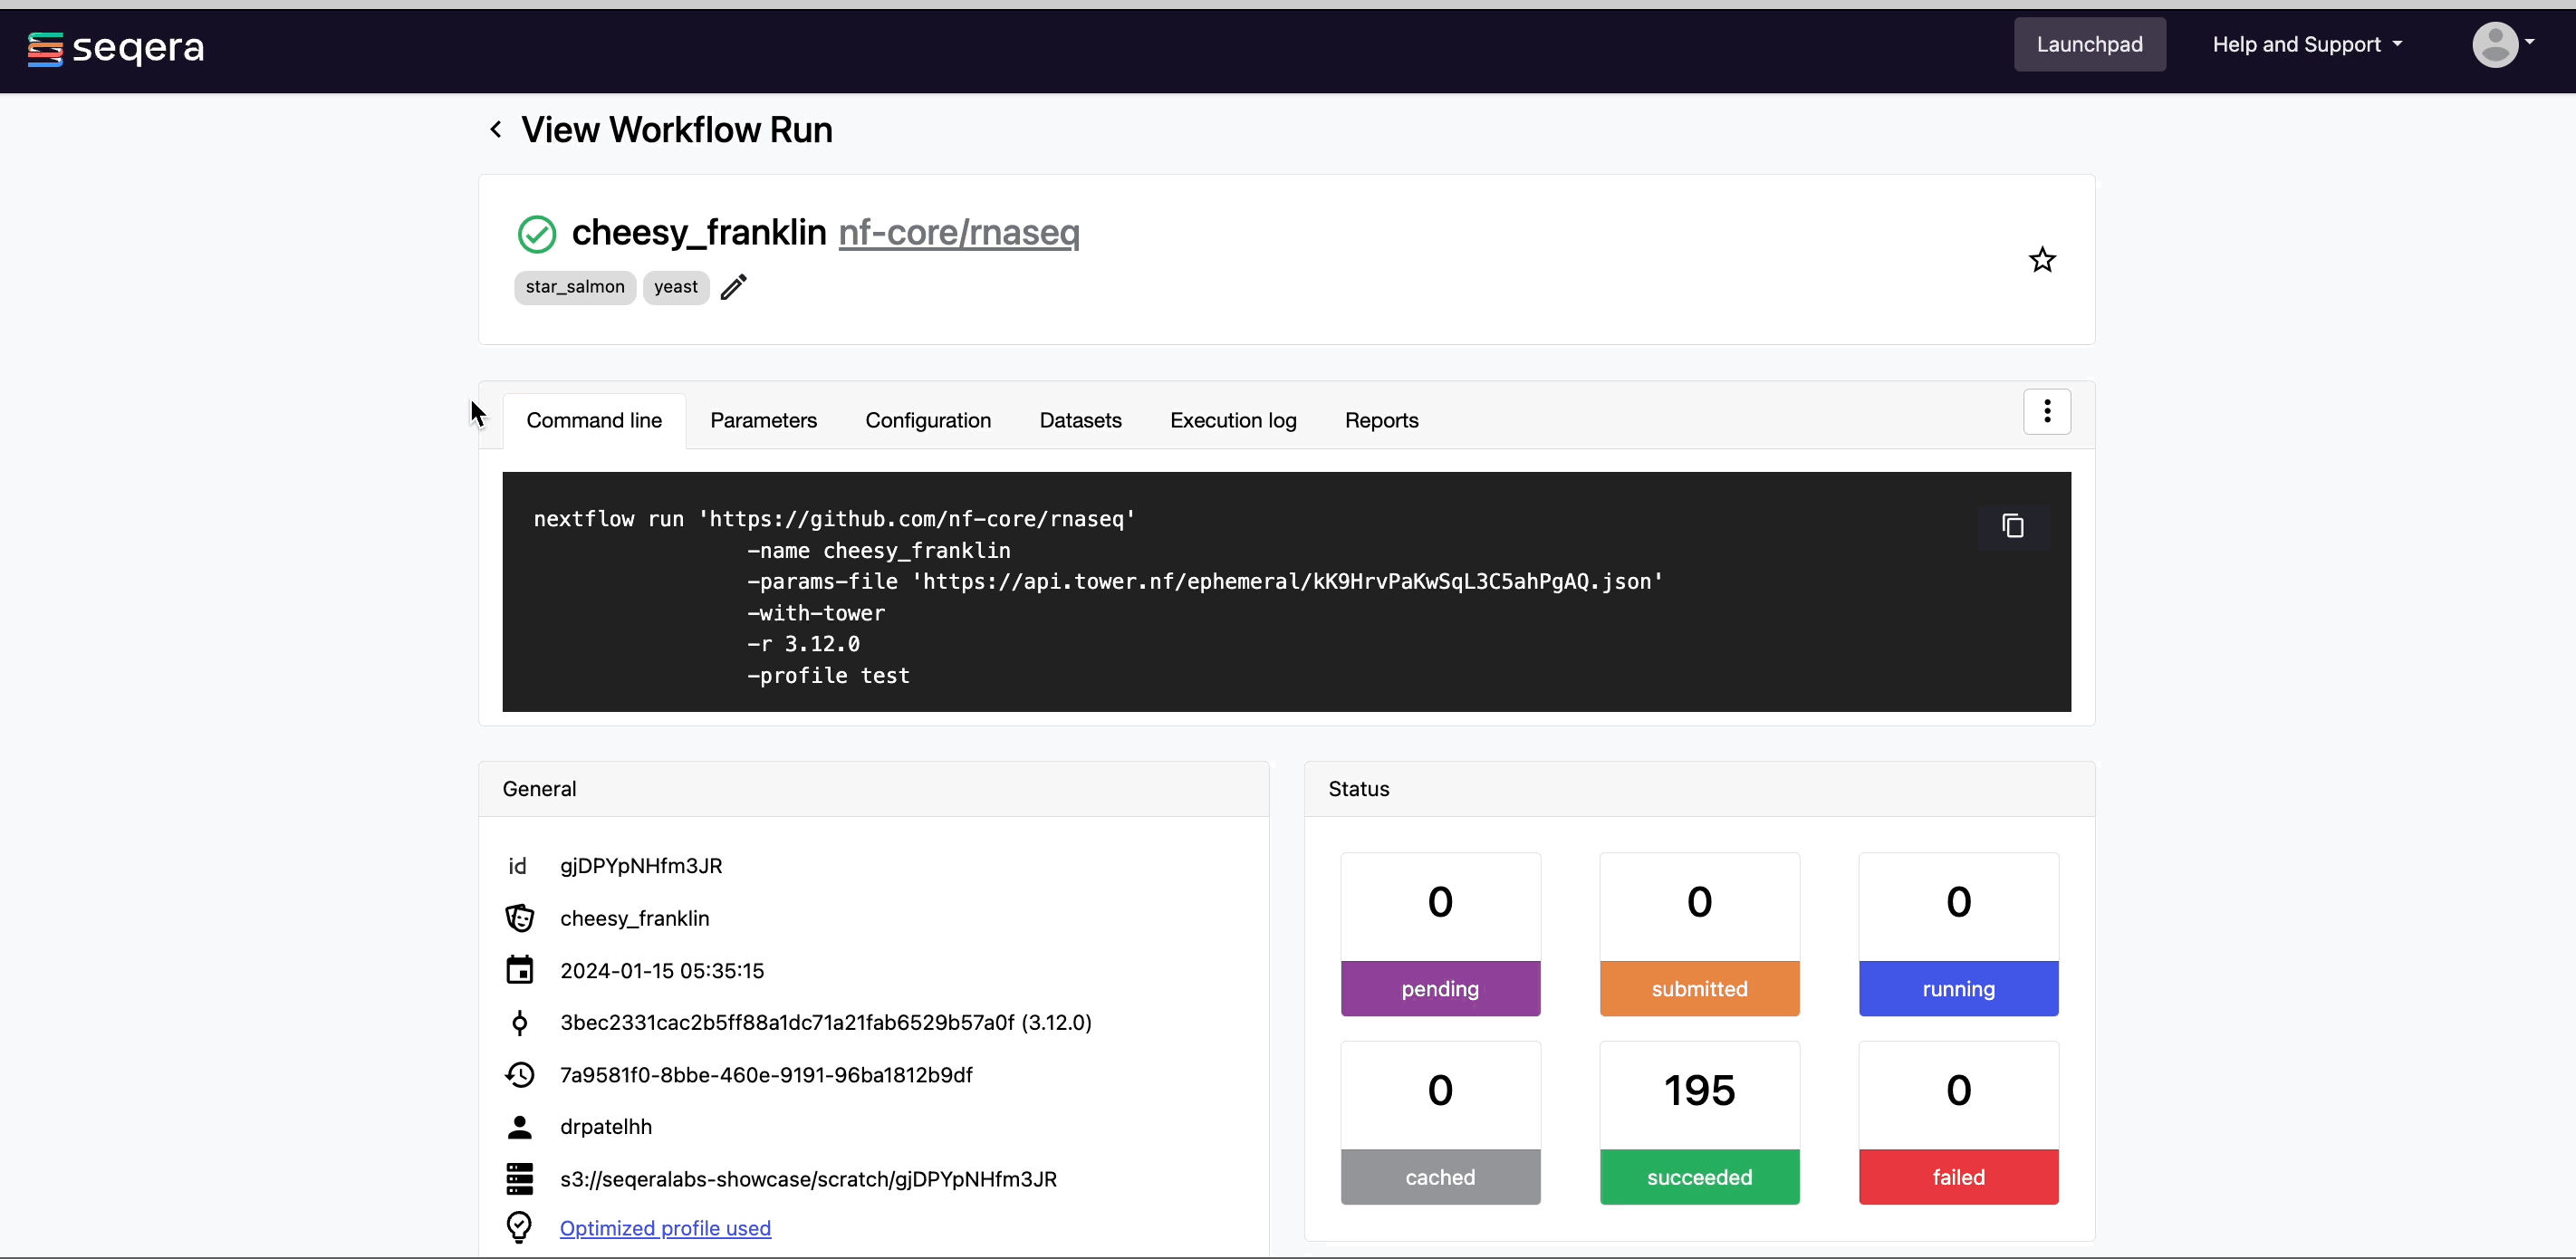
5. Monitor your pipeline run
Monitor your RNA-Seq analysis in real-time with aggregated statistics, workflow metrics, execution logs, and task details.
6. Visualize results in a single, shareable report
Generate a single HTML report with MultiQC for your RNA-Seq analysis to assess the integrity of your results, including statistics, alignment scores, and quality control metrics. Easily share your findings with collaborators via the report URL.
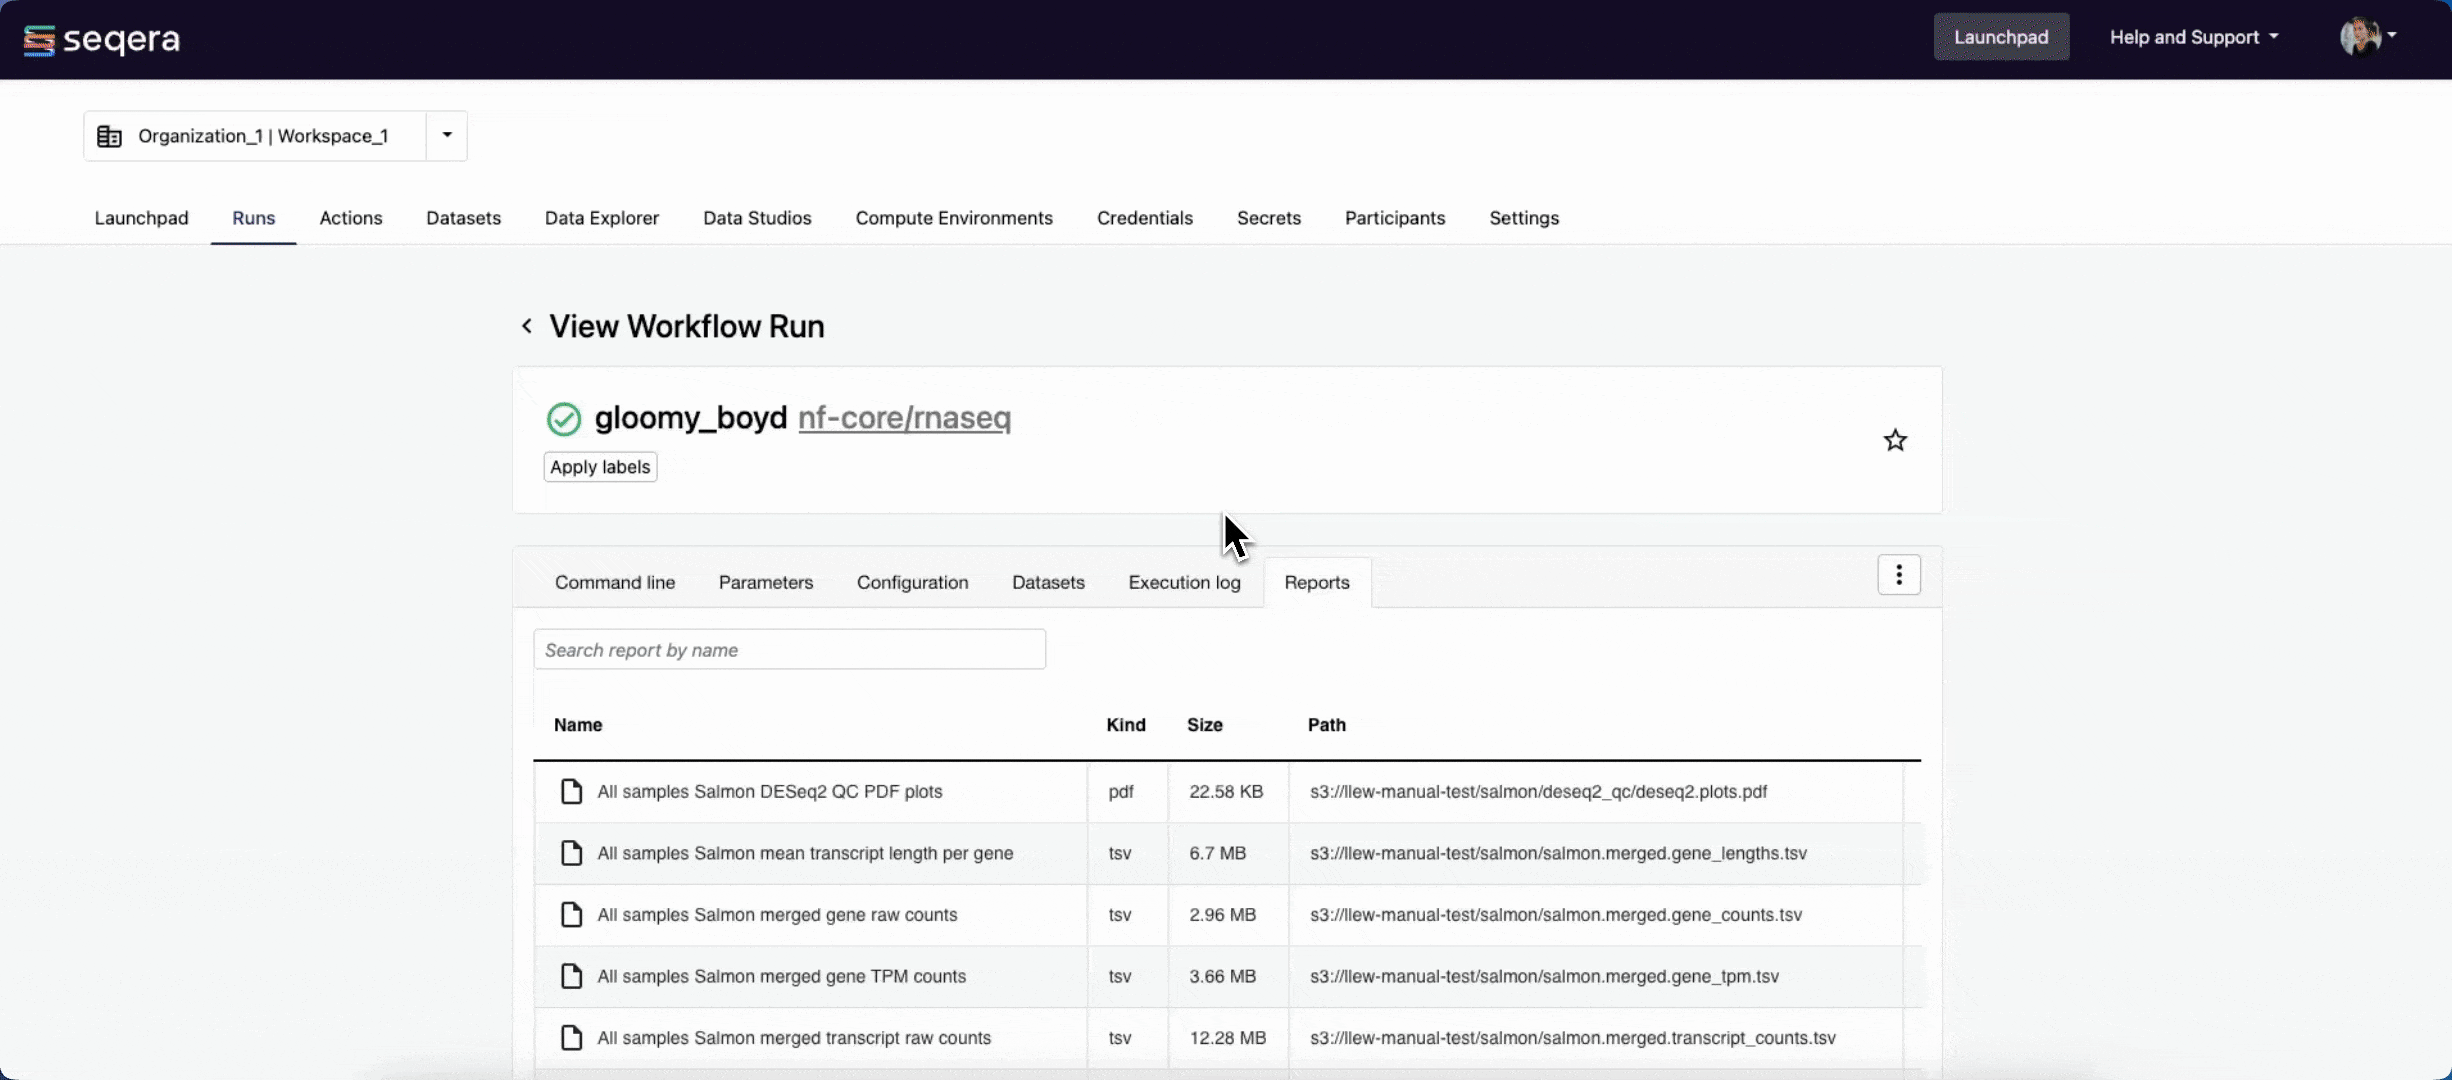
💡Hint: Easily share your findings with collaborators via the report URL.
7. Perform interactive downstream analysis adjacent to your pipeline outputs
RNA-Seq analysis often requires human interpretation or further downstream analysis of pipeline outputs. For example, using DESeq2 for differential gene expression analysis.
Bring interactive analytical notebook environments (R IDE, Jupyter, VSCode) adjacent to your data with Seqera’s Studios and perform downstream analysis as if you were running locally.

Check out the full RNASeq guide now
Try Seqera for free
By leveraging cloud-native technology, Seqera bridges the gap between experimental data and computational analysis, allowing you to accelerate the time from data generation to meaningful scientific insights.
Sign-up for free