12. Get started with Seqera Platform
Seqera Platform, previously known as Nextflow Tower, is the centralized command post for data management and workflows. It brings monitoring, logging and observability to distributed workflows and simplifies the deployment of workflows on any cloud, cluster or laptop. In Seqera Platform terminology, a workflow is what we've been working on so far, and pipelines are pre-configured workflows that can be used by all users in a workspace. It is composed of a workflow repository, launch parameters, and a compute environment. We'll stick to these definitions in this section.
Seqera core features include:
- The launching of pre-configured pipelines with ease.
- Programmatic integration to meet the needs of an organization.
- Publishing pipelines to shared workspaces.
- Management of the infrastructure required to run data analysis at scale.
Tip
Sign up to try Seqera for free or request a demo for deployments in your own on-premise or cloud environment.
You can use Seqera Platform via either the CLI, through the online GUI or through the API.
12.1 CLI
You will need to set up your environment to use Seqera Platform. This is a one-time setup.
Create an account and login into Seqera Platform.
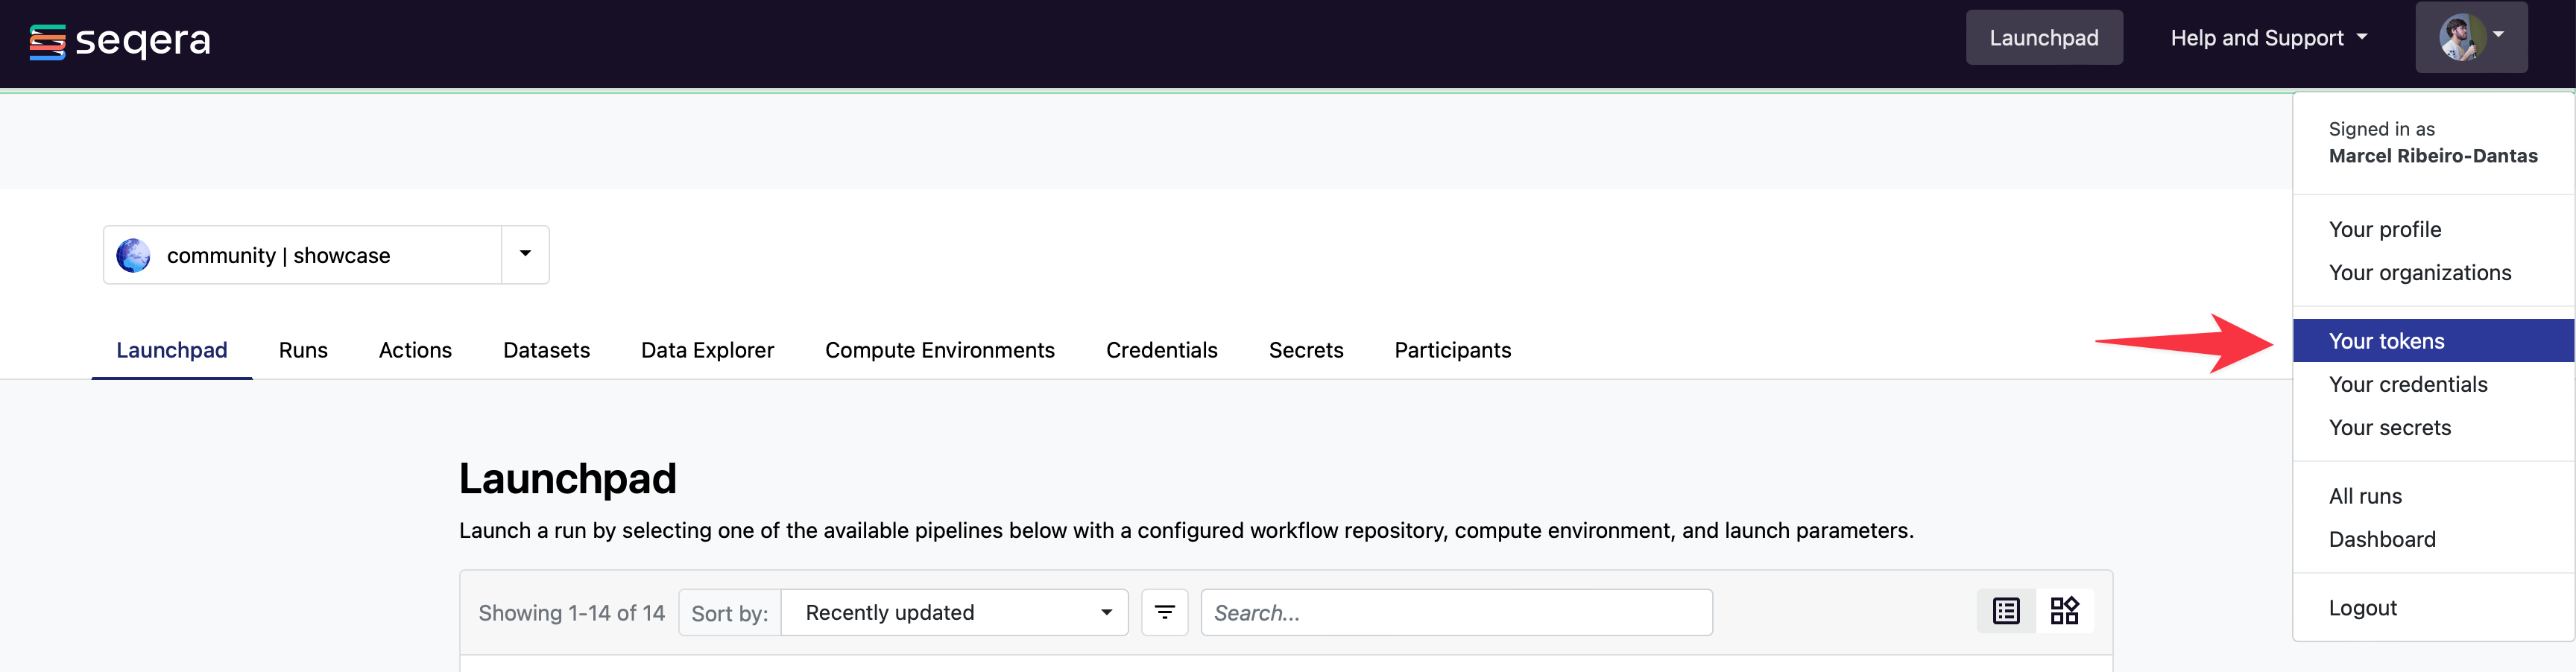
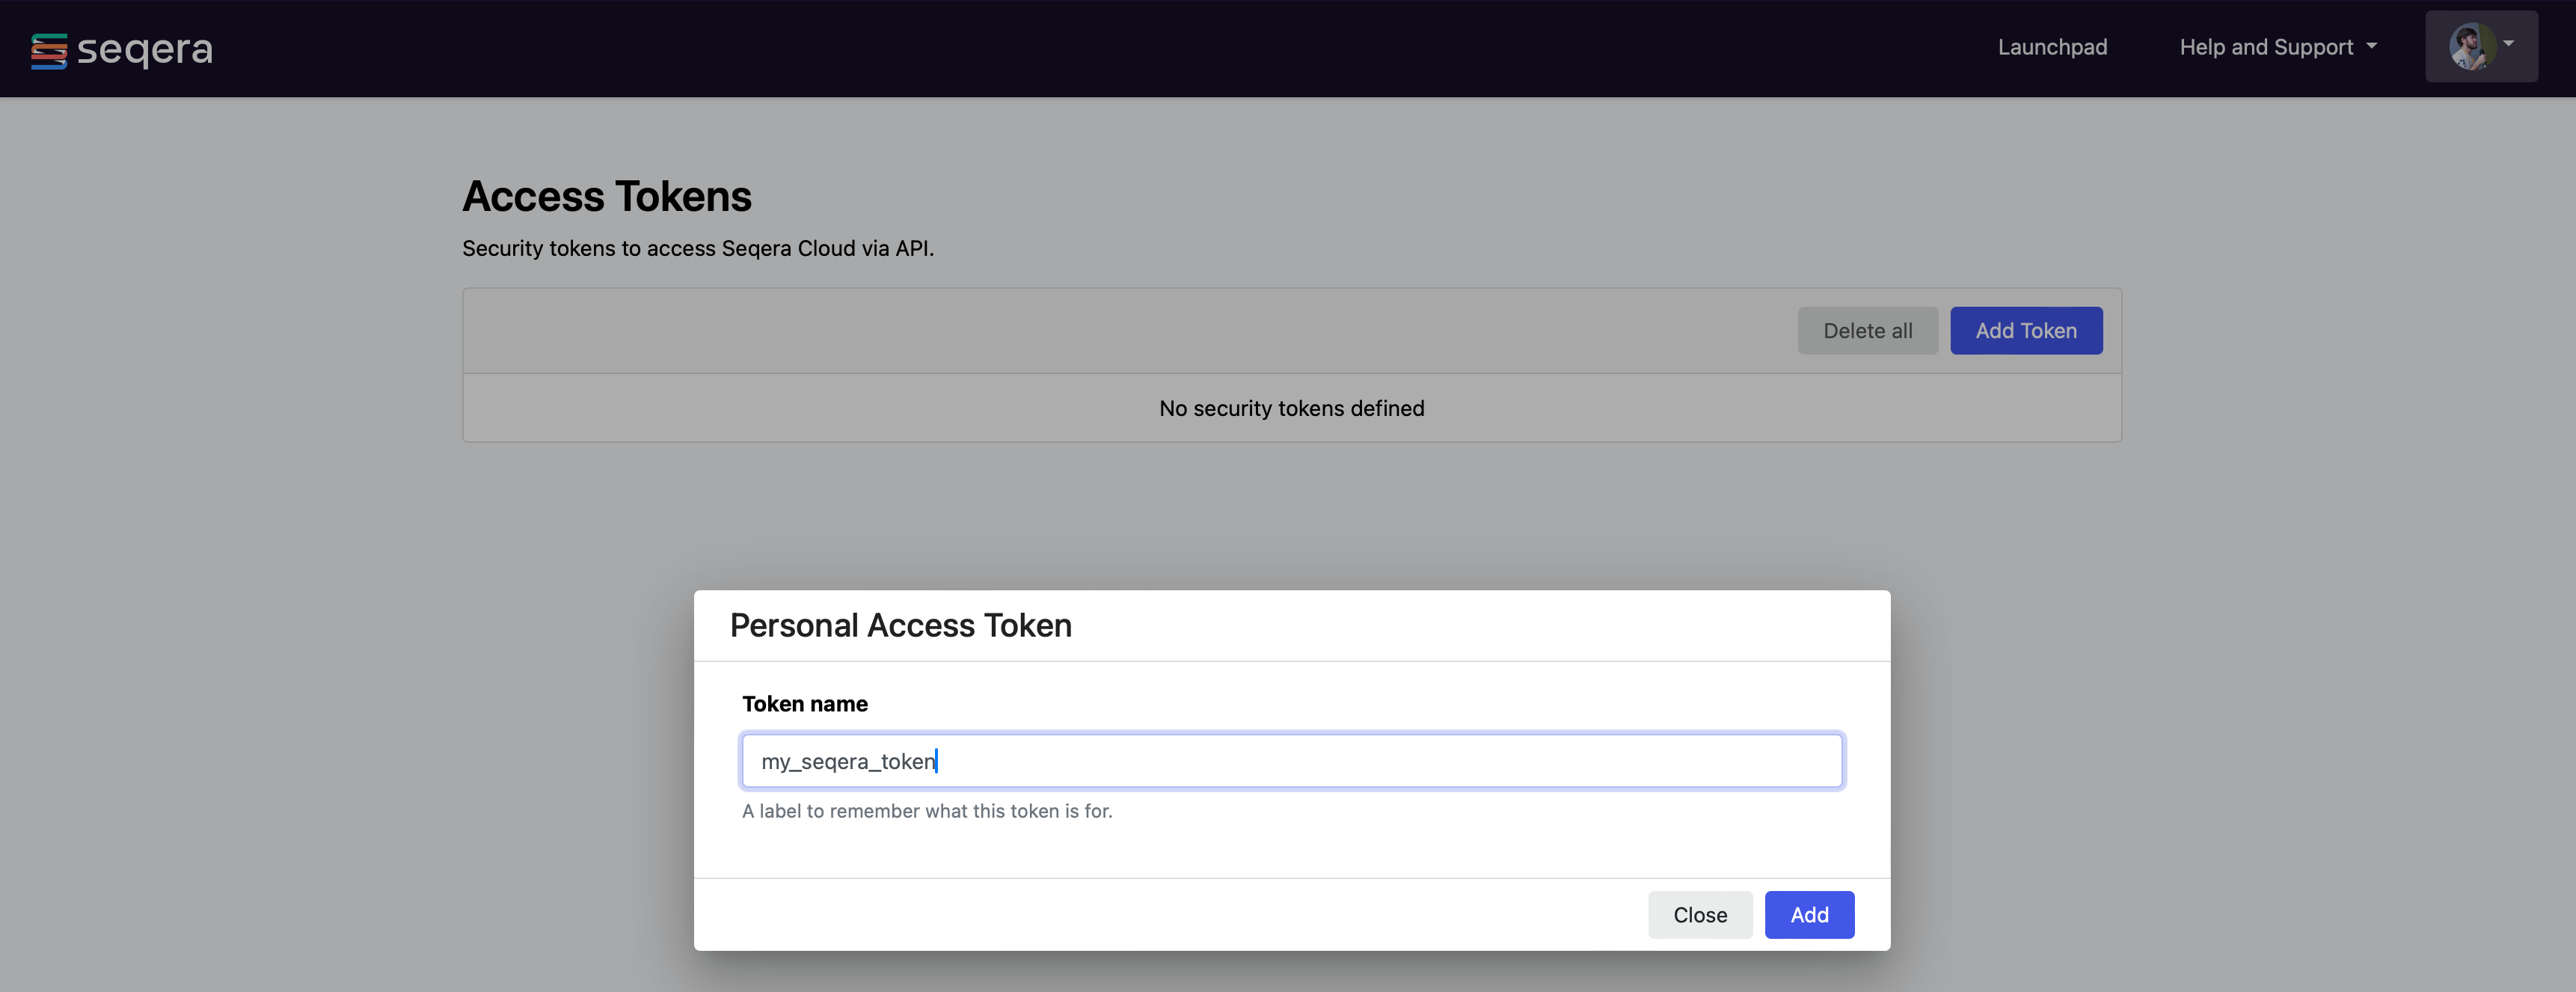
1. Create a new token
You can access your tokens from the Settings drop-down menu:
2. Name your token
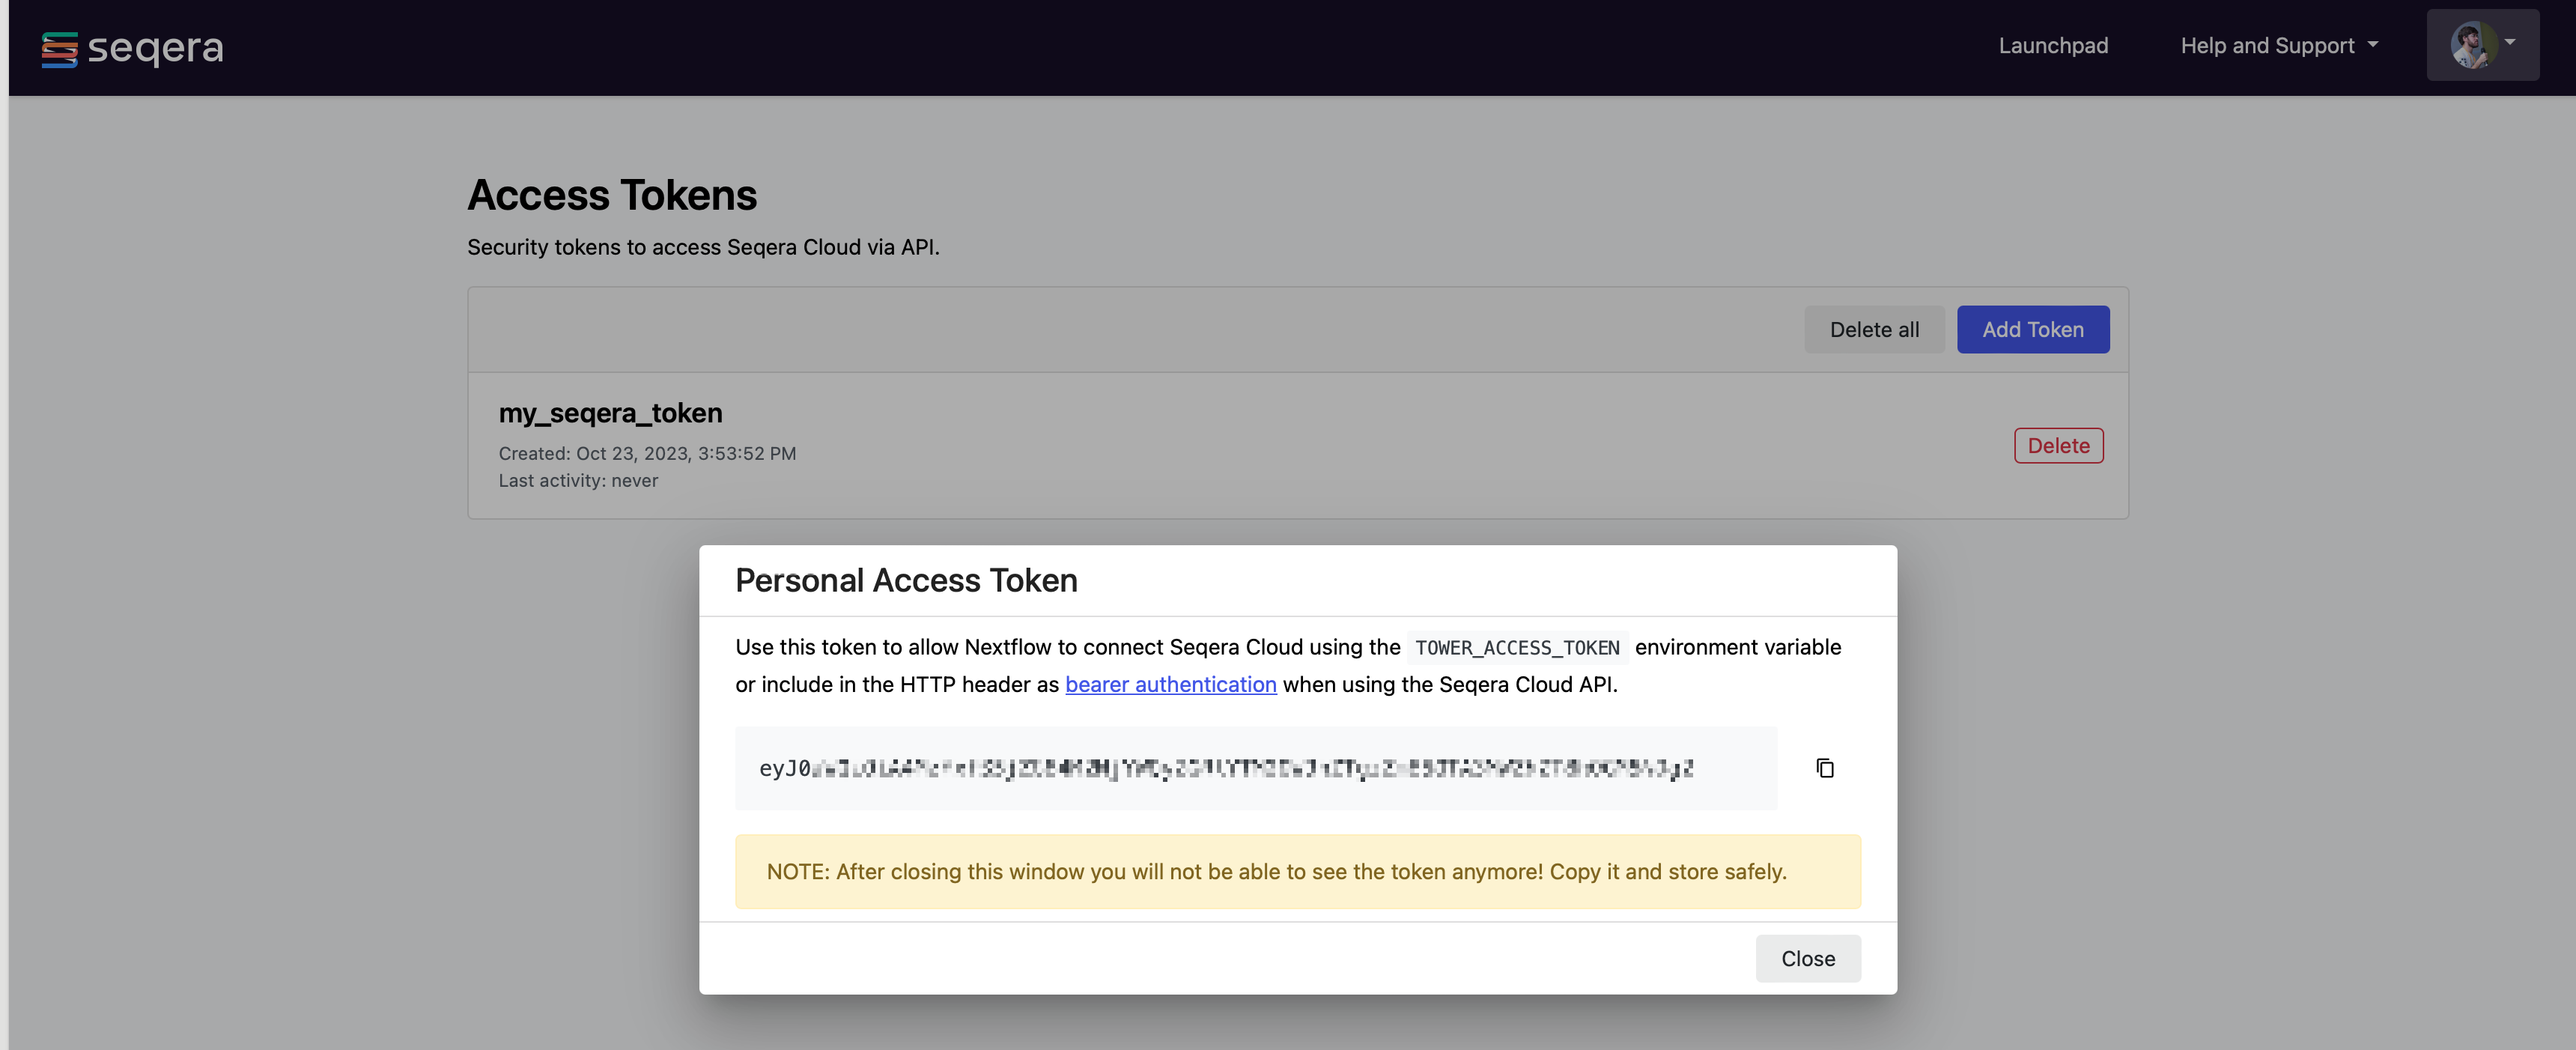
3. Save your token safely
Copy and keep your new token in a safe place.
4. Export your token
Once your token has been created, open a terminal and type:
Where eyxxxxxxxxxxxxxxxQ1ZTE= is the token you have just created.
Note
Check your nextflow -version. Bearer tokens require Nextflow version 20.10.0 or later and can be set with the second command shown above. You can change the version if necessary.
To submit a pipeline to a Workspace using the Nextflow command-line tool, add the workspace ID to your environment. For example:
The workspace ID can be found on the organization’s Workspaces overview page.
5. Run Nextflow with Seqera Platform
Run your Nextflow workflows as usual with the addition of the -with-tower command:
You will see and be able to monitor your Nextflow jobs in Seqera Platform.
To configure and execute Nextflow jobs in Cloud environments, visit the Compute environments section.
Exercise
Run the RNA-Seq script7.nf using the -with-tower flag, after correctly completing the token settings outlined above.
Tip
Go to https://tower.nf/, login, then click the run tab, and select the run that you just submitted. If you can’t find it, double check your token was entered correctly.
Summary
In this step you have learned:
- How to create and add your token and workspace.
- How to launch a pipeline with Seqera Platform.
12.2 Online GUI
To run using the GUI, there are three main steps:
- Create an account and login into Seqera Platform, available free of charge, at tower.nf.
- Create and configure a new compute environment.
- Start launching pipelines.
12.2.1 Configuring your compute environment
Seqera Platform uses the concept of Compute Environments to define the execution platform where a workflow will run.
It supports the launching of workflows into a growing number of cloud and on-premise infrastructures.
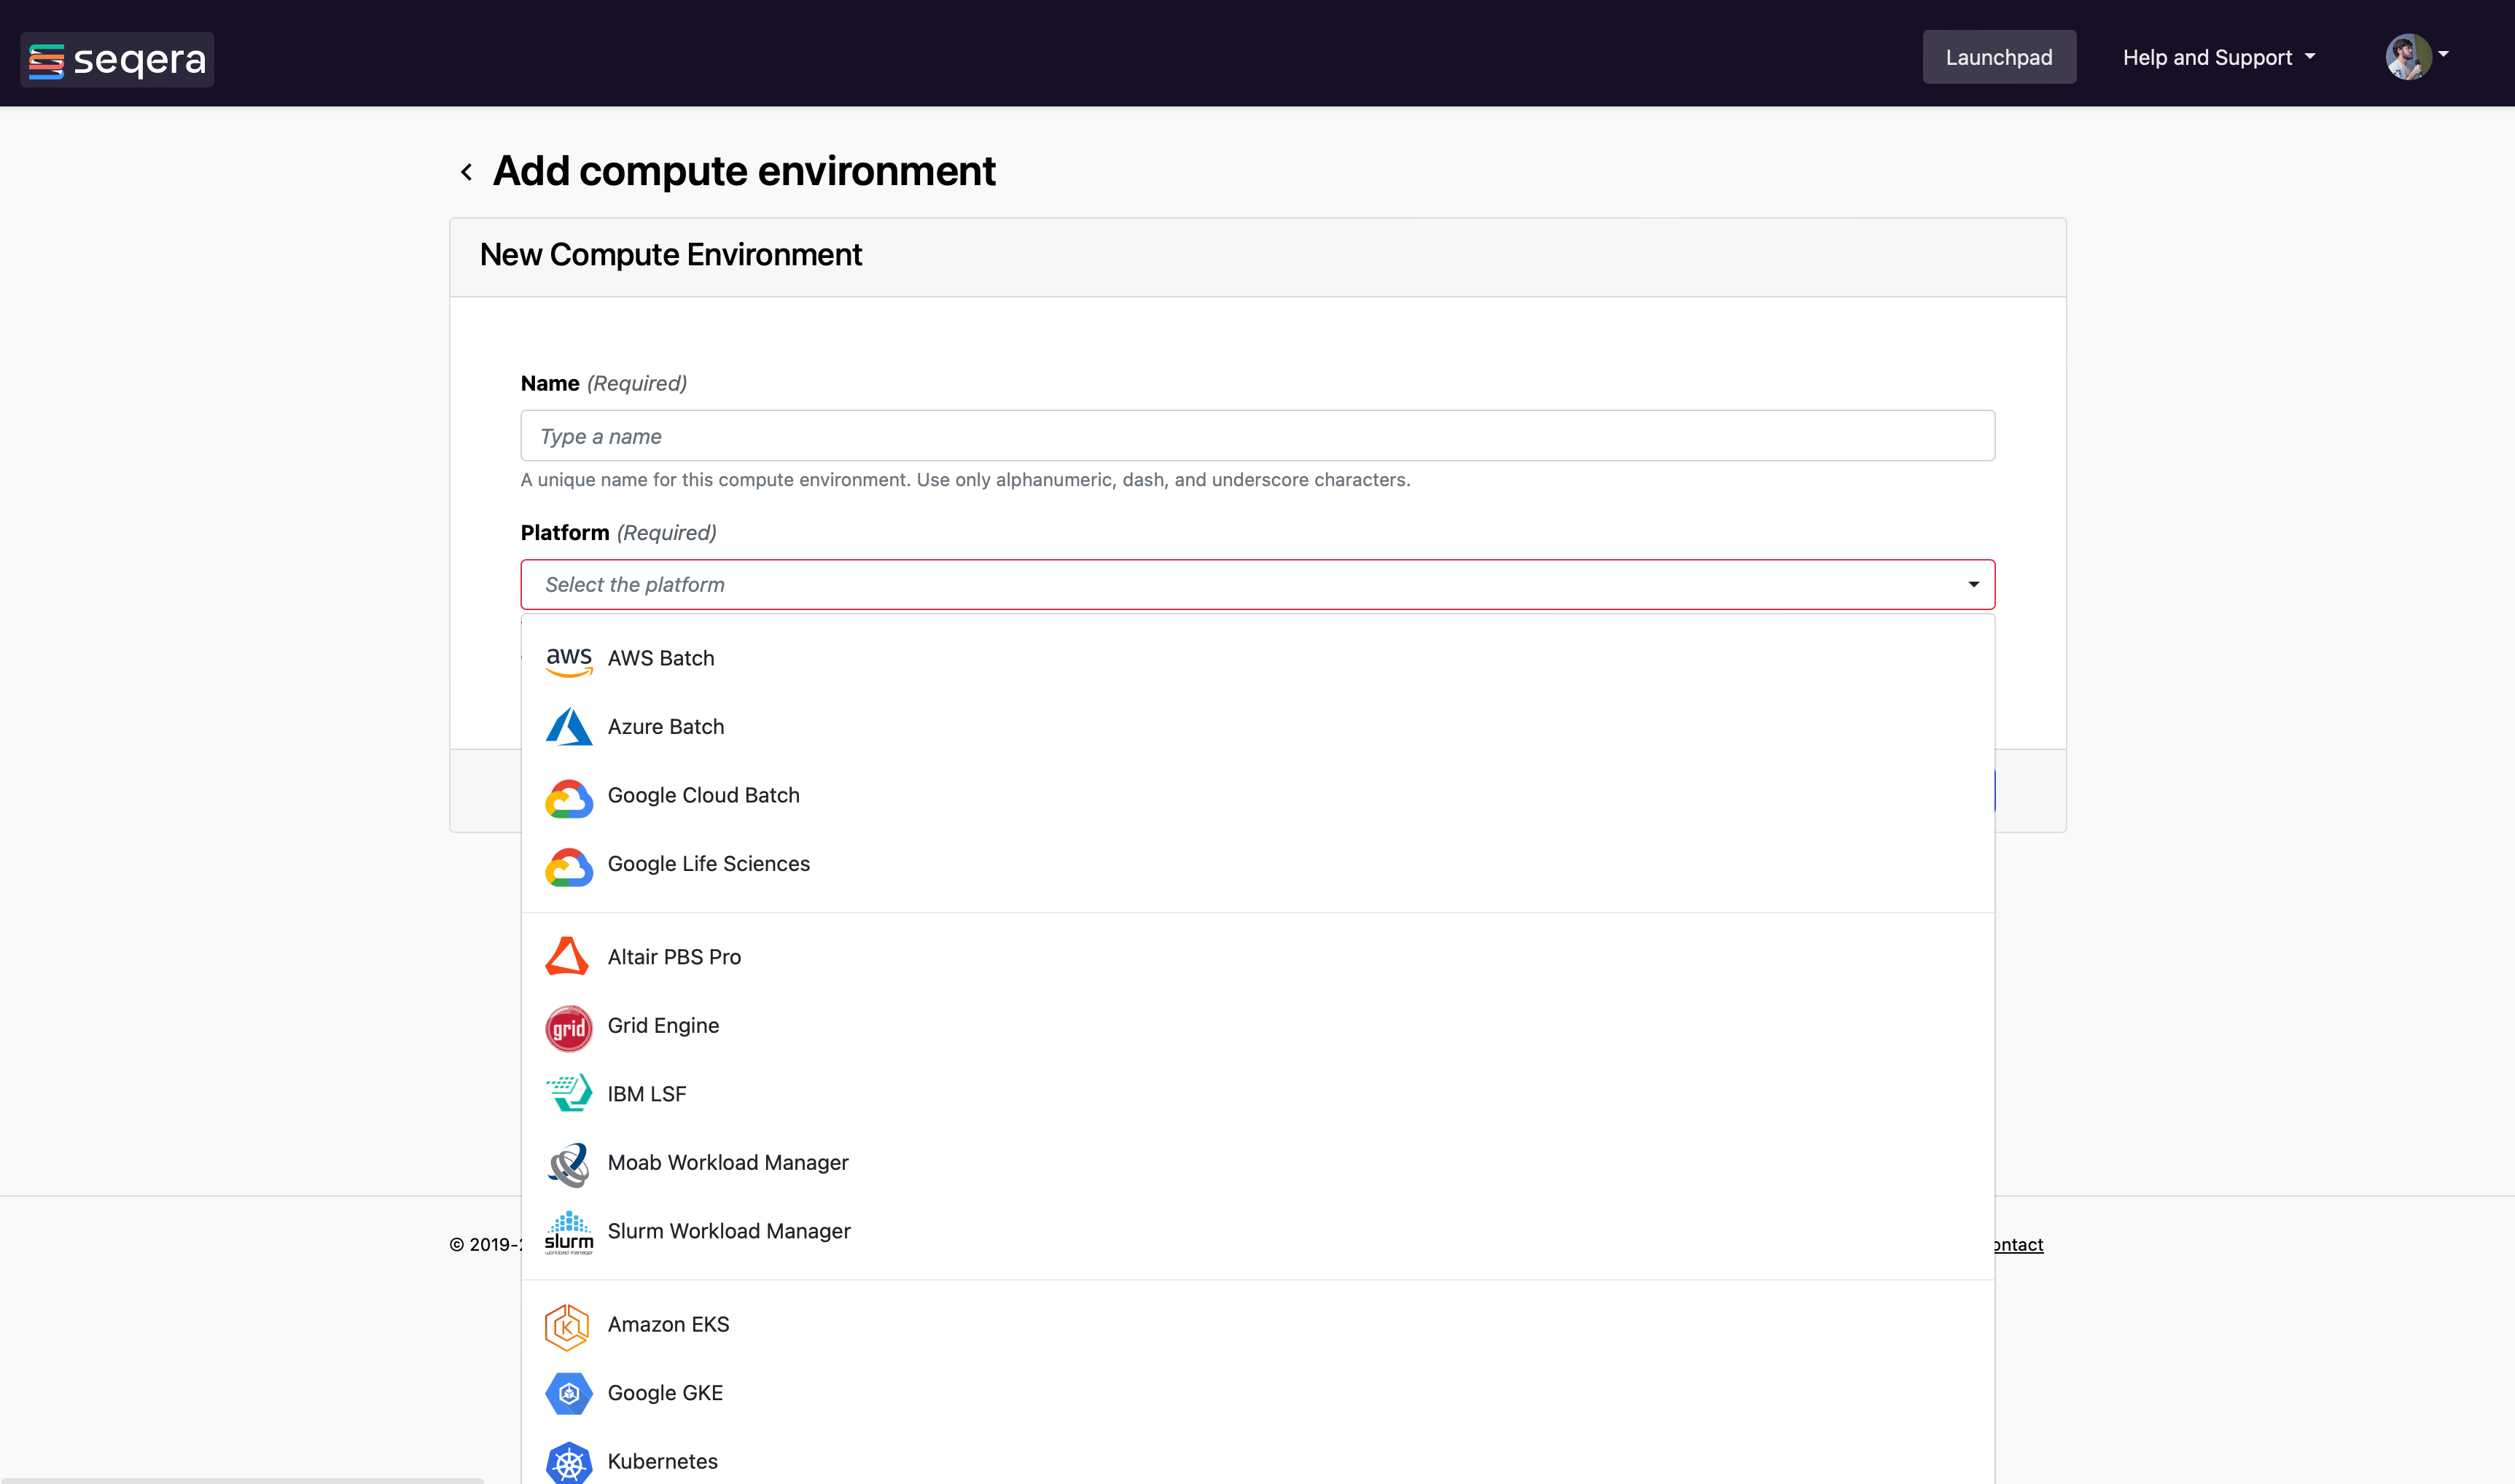
Each compute environment must be pre-configured to enable Seqera Platform to submit tasks. You can read more on how to set up each environment using the links below.
The following guides describe how to configure each of these compute environments.
12.2.2 Selecting a default compute environment
If you have more than one Compute Environment, you can select which one will be used by default when launching a pipeline.
- Navigate to your compute environments.
- Choose your default environment by selecting the Make primary button.
Congratulations!
You are now ready to launch workflows with your primary compute environment.
12.2.3 Launchpad
Launchpad makes it easy for any workspace user to launch a pre-configured pipeline.
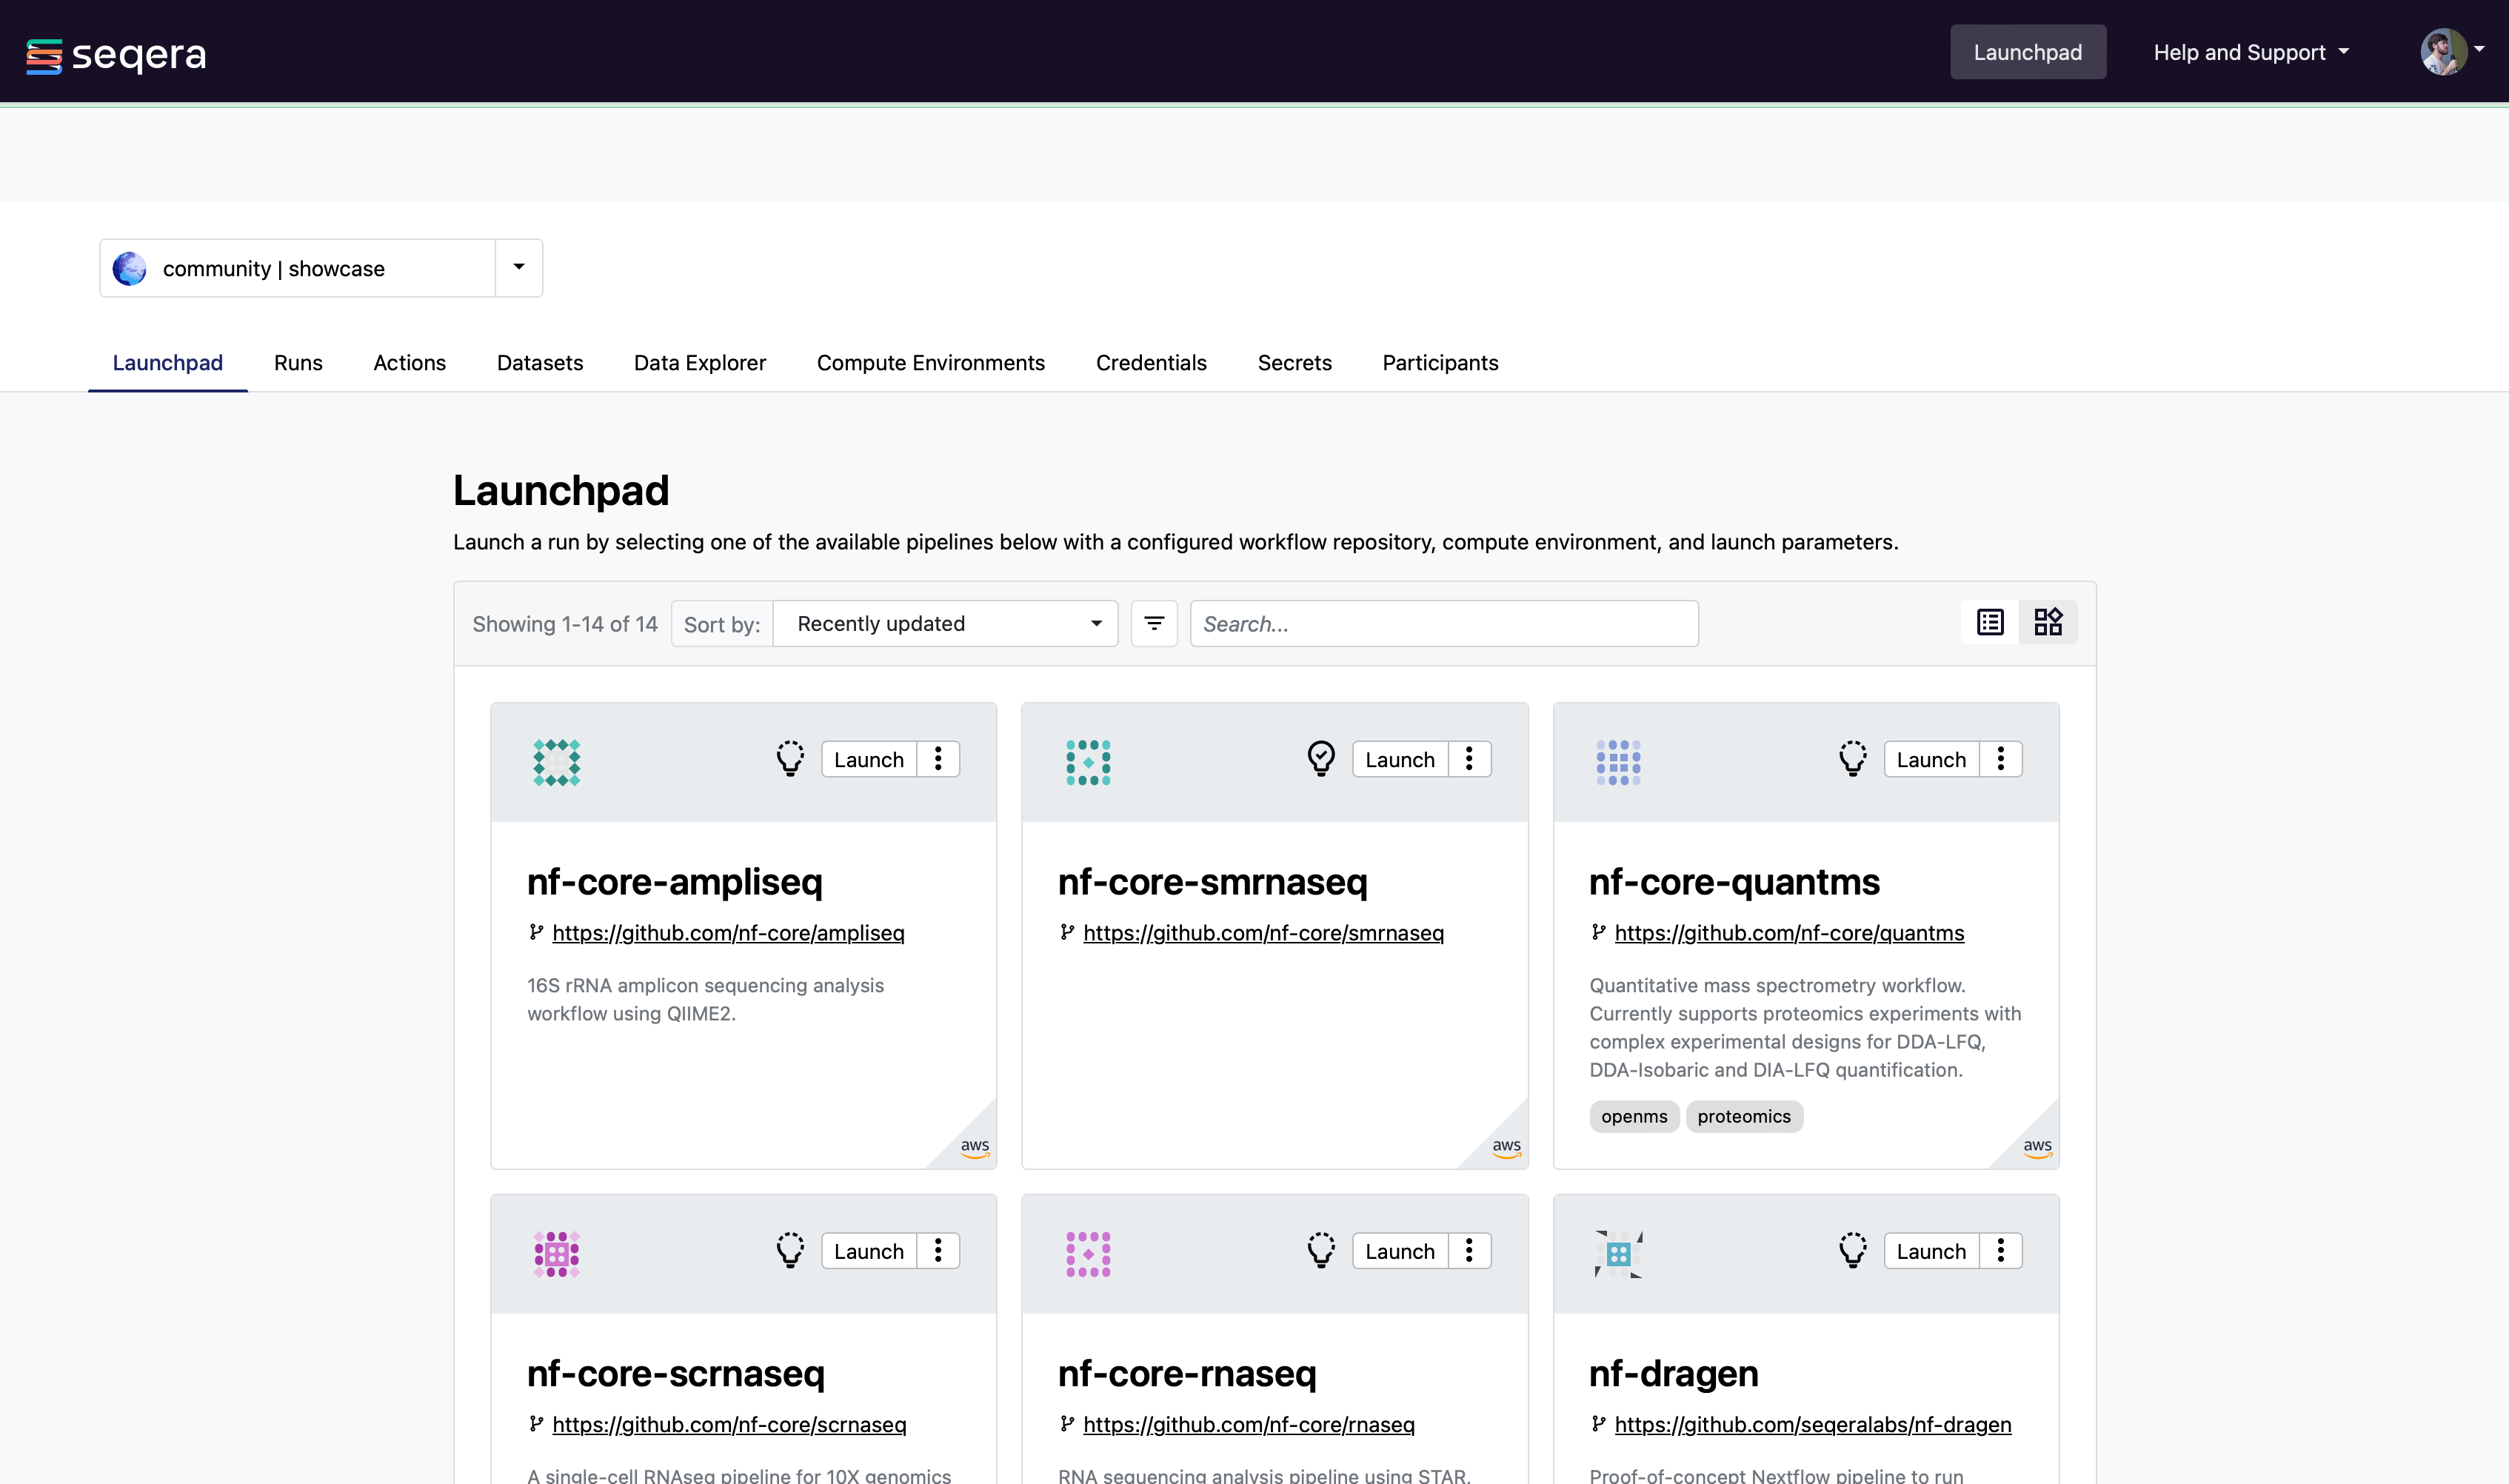
A pipeline is a repository containing a Nextflow workflow, a compute environment and workflow parameters.
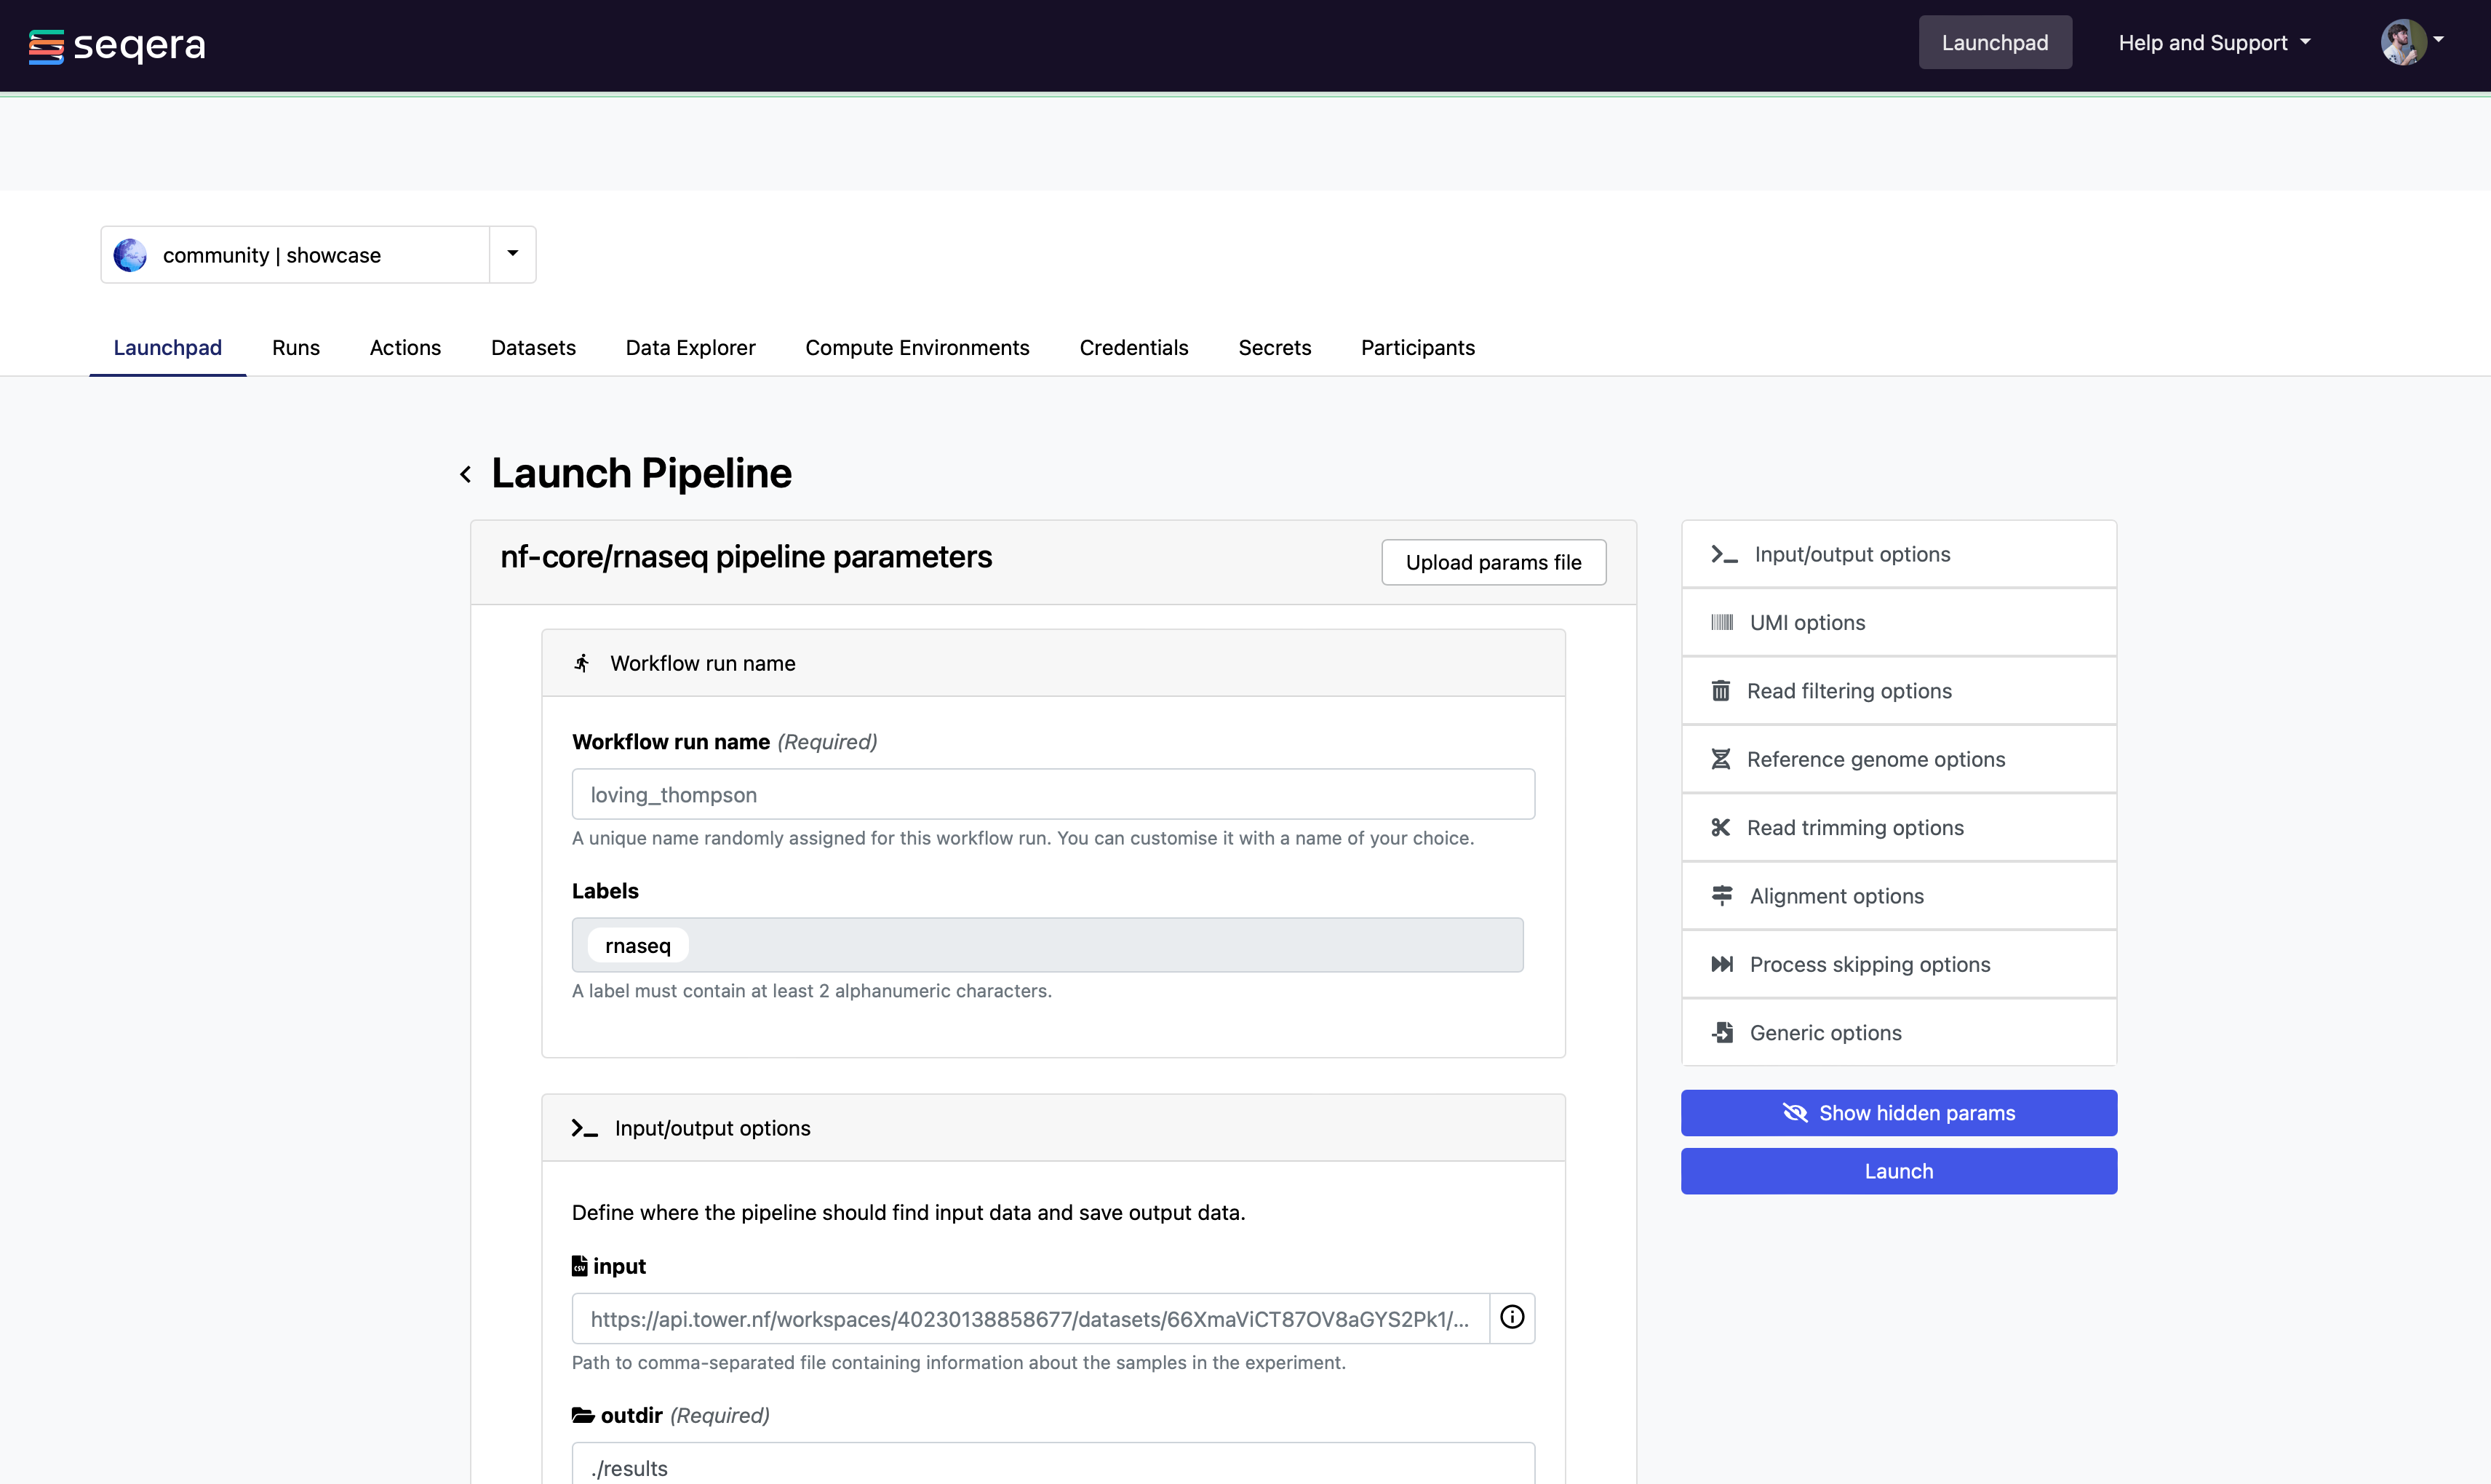
12.2.4 Pipeline Parameters Form
Launchpad automatically detects the presence of a nextflow_schema.json in the root of the repository and dynamically creates a form where users can easily update the parameters.
Info
The parameter forms view will appear if the pipeline has a Nextflow schema file for the parameters. Please refer to the Nextflow Schema guide to learn more about the schema file use-cases and how to create them.
This makes it trivial for users without any expertise in Nextflow to enter their workflow parameters and launch.
12.2.5 Adding a new pipeline
Adding a pipeline to the pre-saved workspace launchpad is detailed in full on the Seqera webpage docs.
In brief, these are the steps you need to follow to set up a pipeline.
- Select the Launchpad button in the navigation bar. This will open the Launch Form.
- Select a compute environment.
- Enter the repository of the workflow you want to launch. e.g. https://github.com/nf-core/rnaseq.git
- Select a workflow Revision number. The Git default branch (main/master) or
manifest.defaultBranchin the Nextflow configuration will be used by default. - Set the Work directory location of the Nextflow work directory. The location associated with the compute environment will be selected by default.
- Enter the name(s) of each of the Nextflow Config profiles followed by the
Enterkey. See the Nextflow Config profiles documentation for more details. -
Enter any workflow parameters in YAML or JSON format. YAML example:
-
Select Launch to begin the pipeline execution.
Info
Nextflow workflows are simply Git repositories and can be changed to any public or private Git-hosting platform. See Git Integration in the Seqera Platform docs and Pipeline Sharing in the Nextflow docs for more details.
Note
The credentials associated with the compute environment must be able to access the work directory.
Info
In the configuration, the full path to a bucket must be specified with single quotes around strings and no quotes around booleans or numbers.
Tip
To create your own customized Nextflow Schema for your workflow, see the examples from the nf-core workflows that have adopted this approach. For example, eager and rnaseq.
For advanced settings options check out this page.
There is also community support available if you get into trouble, join the Nextflow Slack by following this link.
Summary
In this step you have learned:
- How to create an account and login into Seqera Platform
- How to configure your compute environment.
- How to add, customize, and launch a pipeline with Seqera Platform.
12.3 API
To learn more about using the Seqera Platform API, visit the API section in this documentation.
12.4 Workspaces and Organizations
Seqera Platform simplifies the development and execution of pipeline by providing a centralized interface for users and organizations.
Each user has a unique workspace where they can interact and manage all resources such as workflows, compute environments and credentials. Details of this can be found here.
Organisations can have multiple workspaces with customized access for specific organisation members and collaborators.
12.4.1 Organization resources
You can create your own organization and participant workspace by following the docs at Seqera.
Seqera Platform allows the creation of multiple organizations, each of which can contain multiple workspaces with shared users and resources. This allows any organization to customize and organize the usage of resources while maintaining an access control layer for users associated with a workspace.
12.4.2 Organization users
Any user can be added or removed from a particular organization or a workspace and can be allocated a specific access role within that workspace.
The Teams feature provides a way for organizations to group various users and participants together into teams. For example, workflow-developers or analysts, and apply access control to all the users within this team collectively.
For further information, please refer to the User Management section.
12.4.3 Setting up a new organization
Organizations are the top-level structure and contain Workspaces, Members, Teams and Collaborators.
To create a new Organization:
- Click on the dropdown next to your name and select New organization to open the creation dialog.
-
On the dialog, fill in the fields as per your organization. The Name and Full name fields are compulsory.
Note
A valid name for the organization must follow a specific pattern. Please refer to the UI for further instructions.
-
The rest of the fields such as Description, Location, Website URL and Logo Url are optional.
-
Once the details are filled in, you can access the newly created organization using the organization’s page, which lists all of your organizations.
Note
It is possible to change the values of the optional fields either using the Edit option on the organization’s page or by using the Settings tab within the organization page, provided that you are the Owner of the organization.
Tip
A list of all the included Members, Teams and Collaborators can be found on the organization page.
Summary
In this step you have learned:
- How to create a new organization
- How to access the newly created organization
- How to change organization settings